


How I Painted This Book
A juicy behind-the-scenes look at how I painted a spread from my book

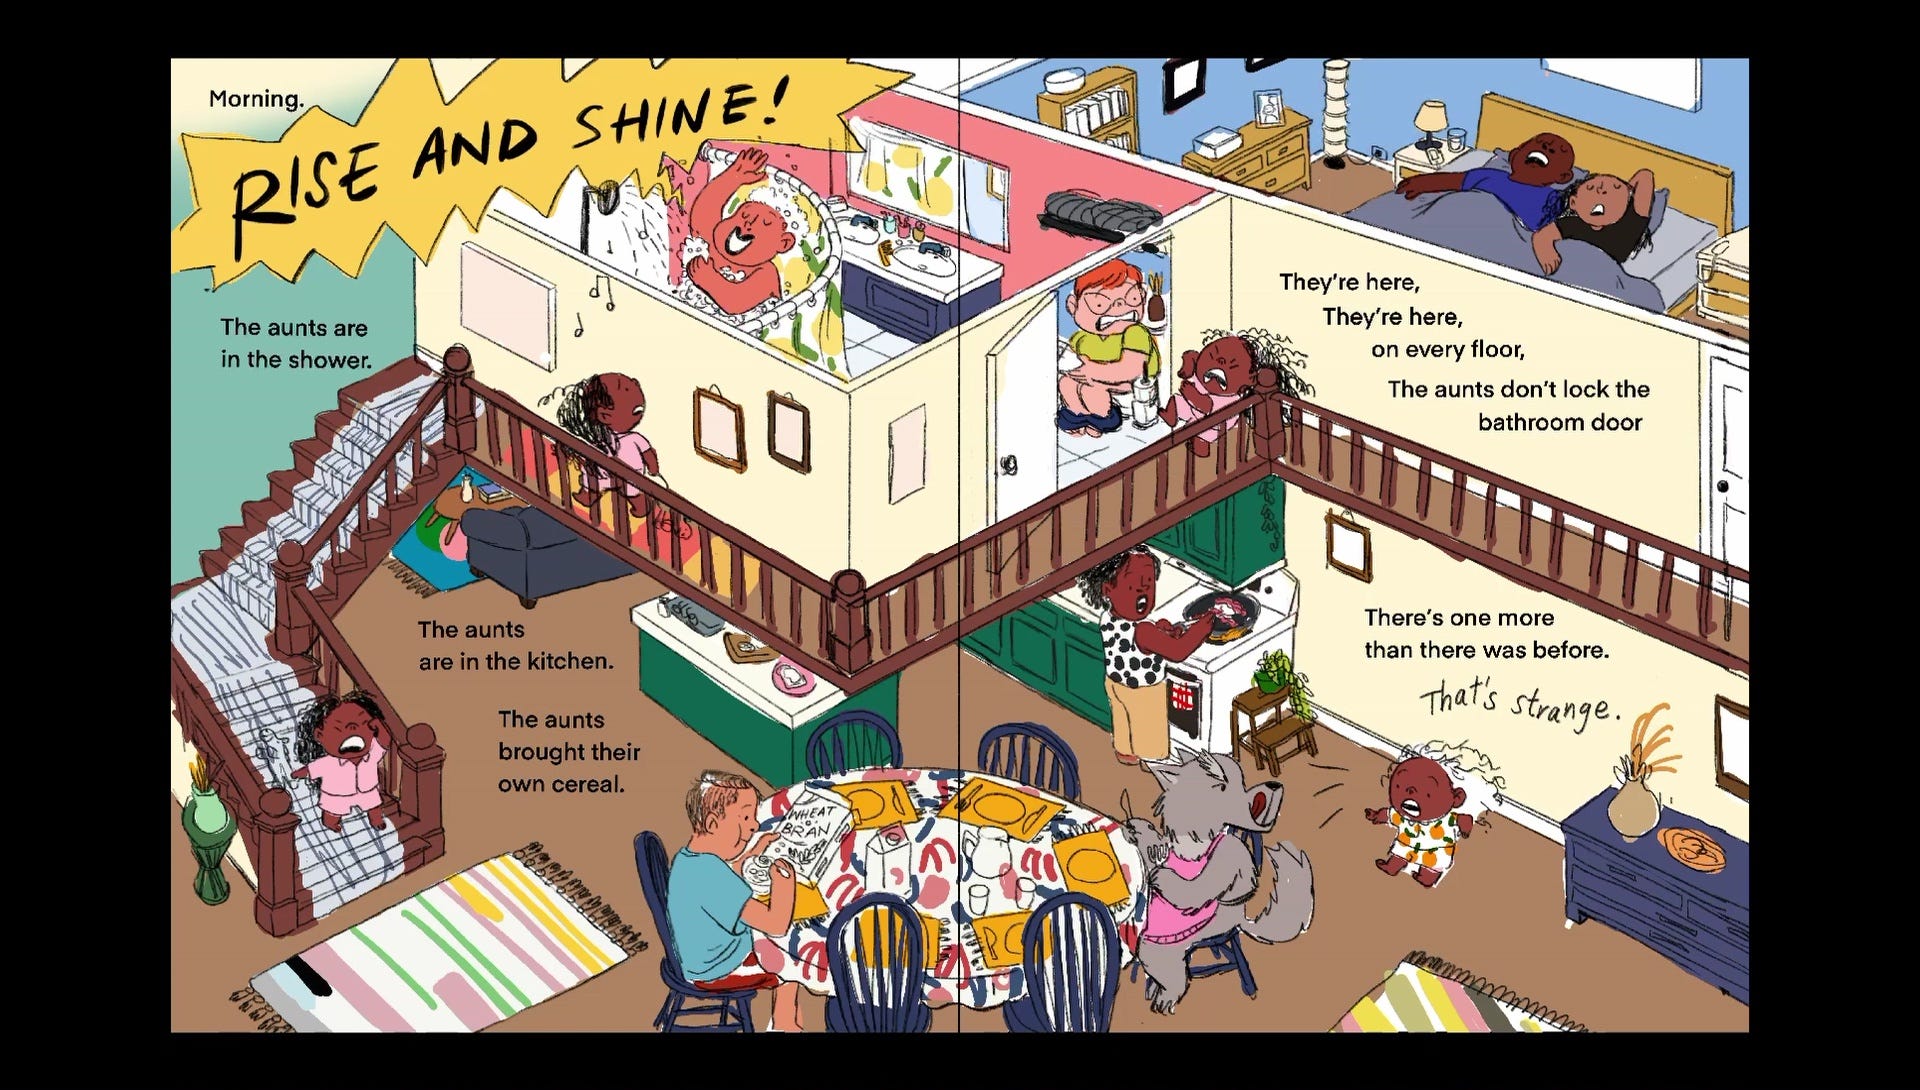
Oh No, the Aunts Are Here hit shelves yesterday! It is a fantastic picture book, illustrated by yours truly, written by Adam Rex and published by Chronicle Books. I know that I have probably talked your ear off about this book by now but today I actually have something super fun to share!
That’s right FELLAS, it’s a full length process video that walks you through the entire painting process for this legendary spread from the book:

This whole book was painted traditionally with watercolor, gouache and colored pencils. You can watch the video below to find out how I managed to pull this off without completely losing my mind:
Okay FINE. If you don’t want to watch the super amazing video that I may have spent way too much time on, here is a quick run through of the process:
Step 1: Thumbnails
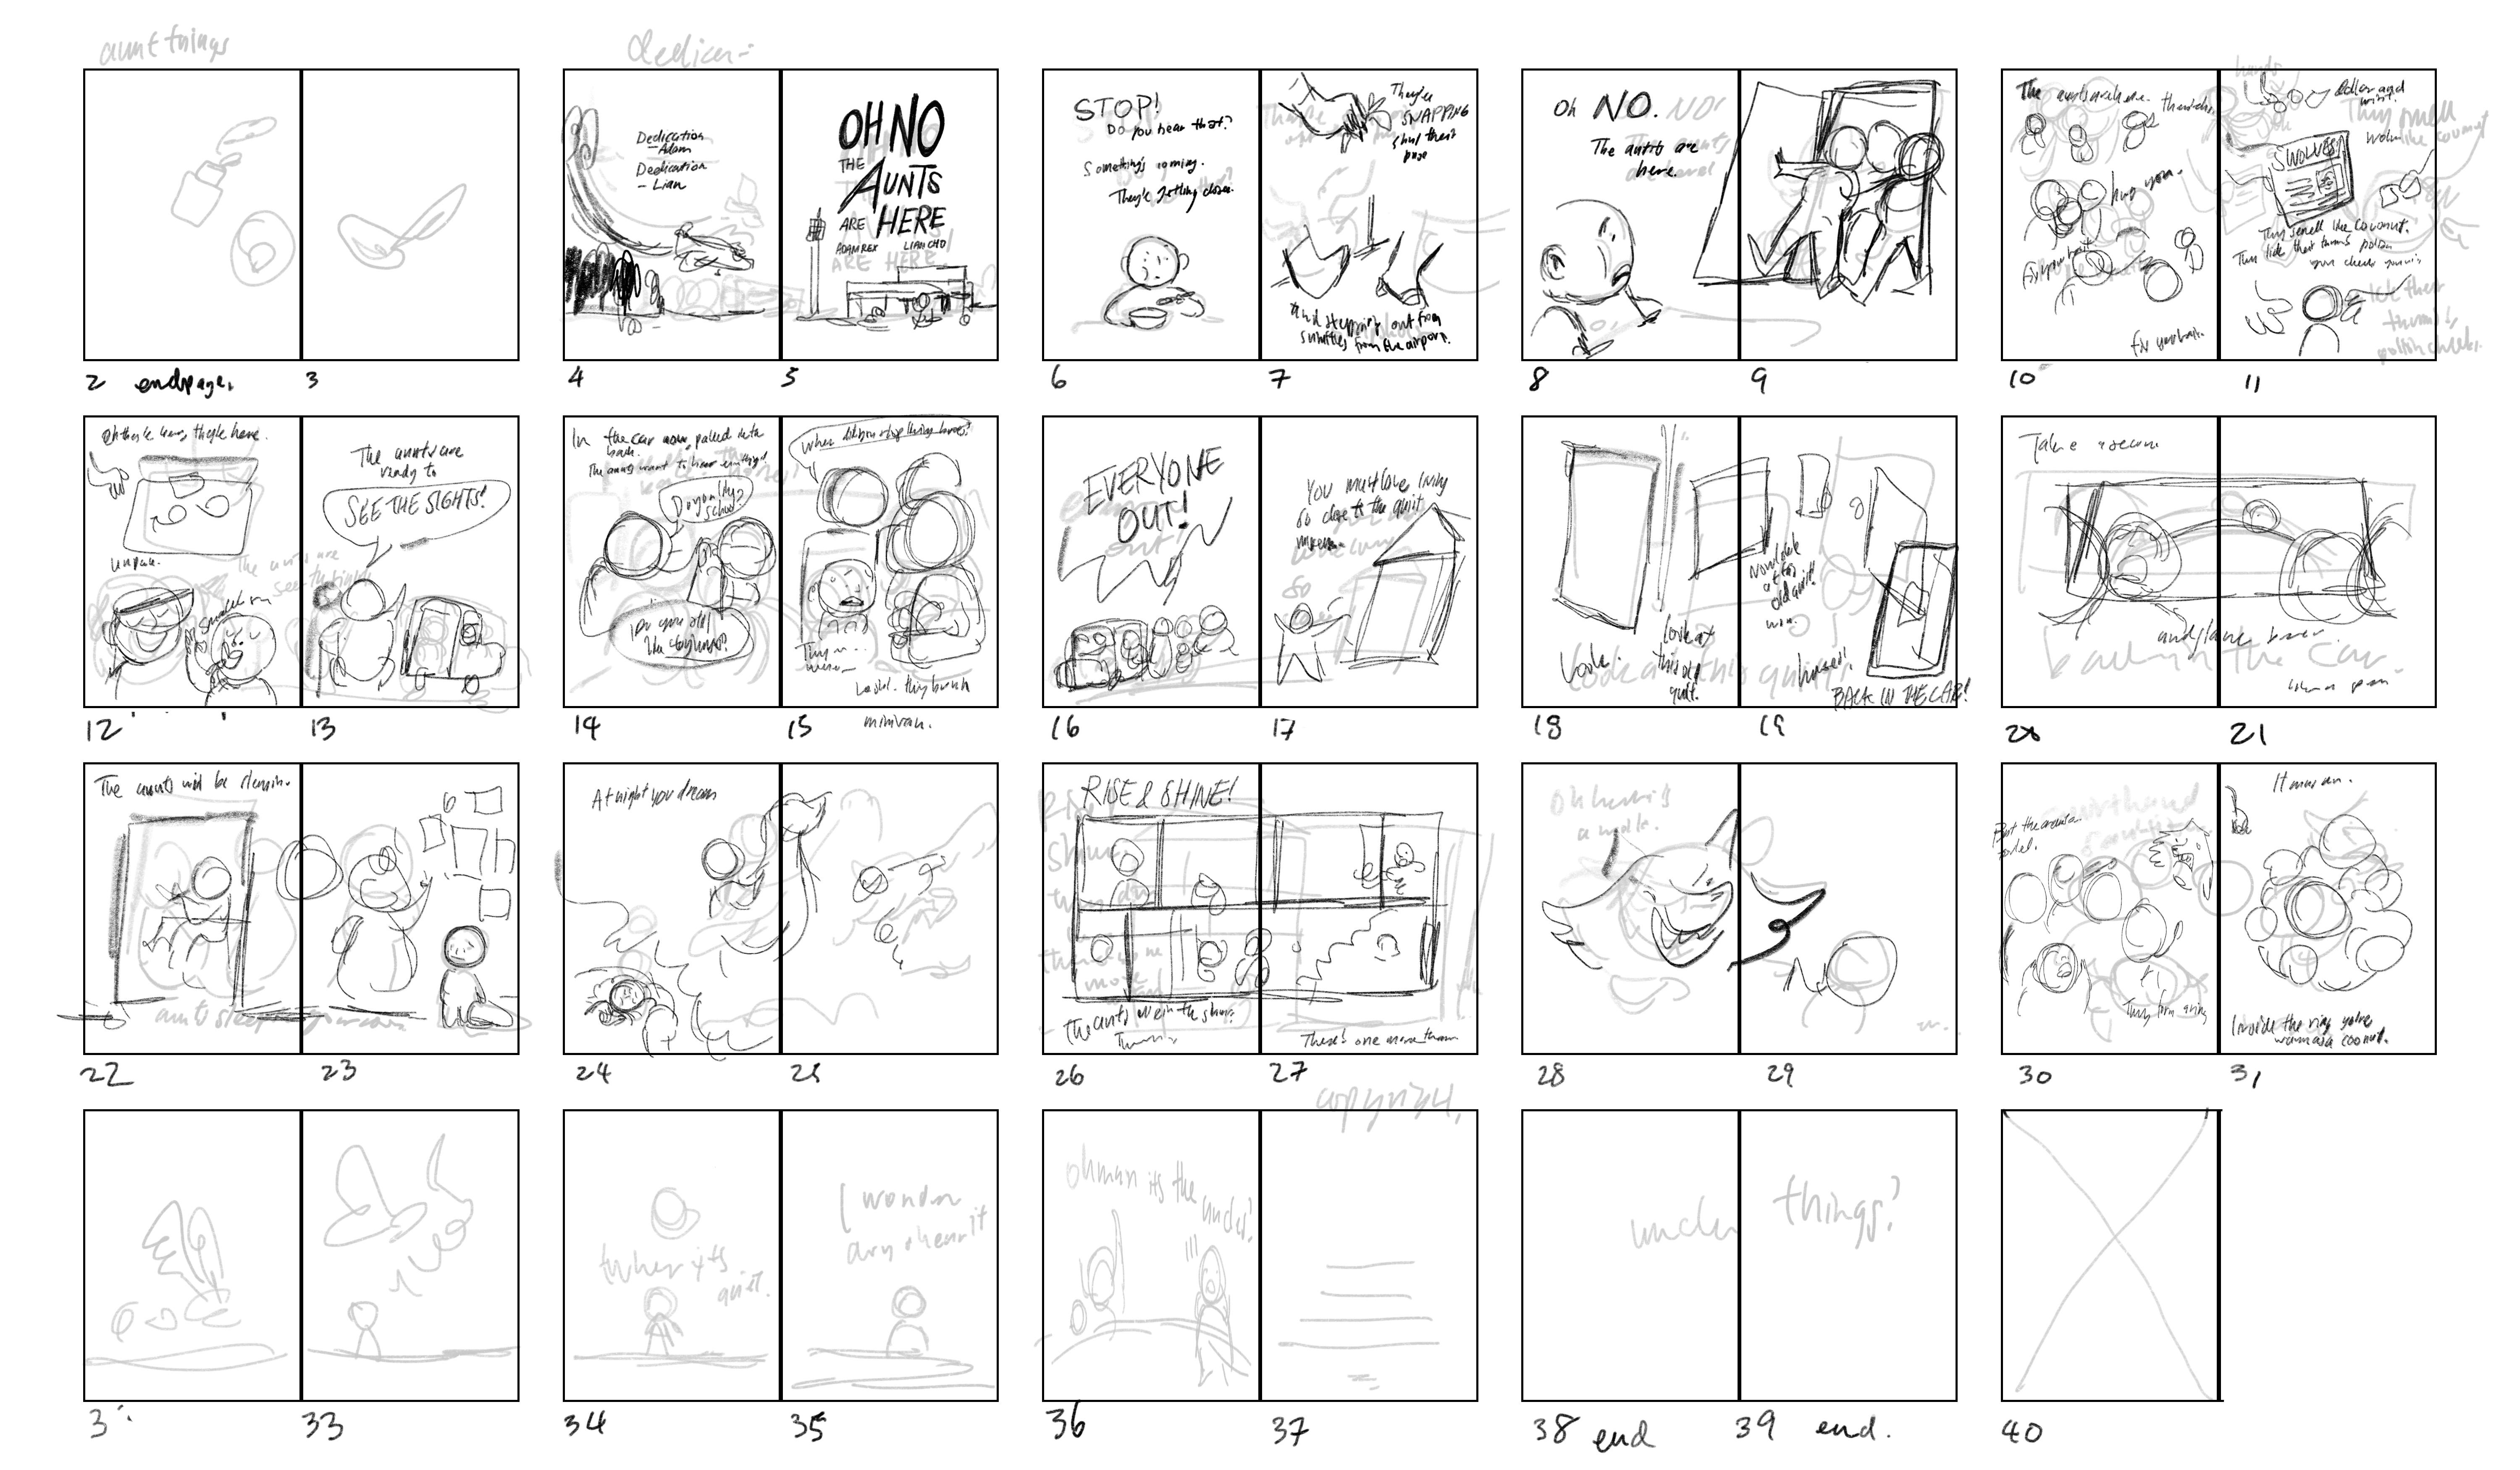
After I receive the manuscript, I always start my books off with thumbnails. It’s the easiest way for me to lay out the entire book and figure out what goes on each page.
Step 2: Rough Sketch
After thumbnails are established and I have a rough idea of what is supposed to happen on each page then I start with really rough sketches. I like to do my sketches on Procreate because then I can move things around without having to restart the entire drawing again.
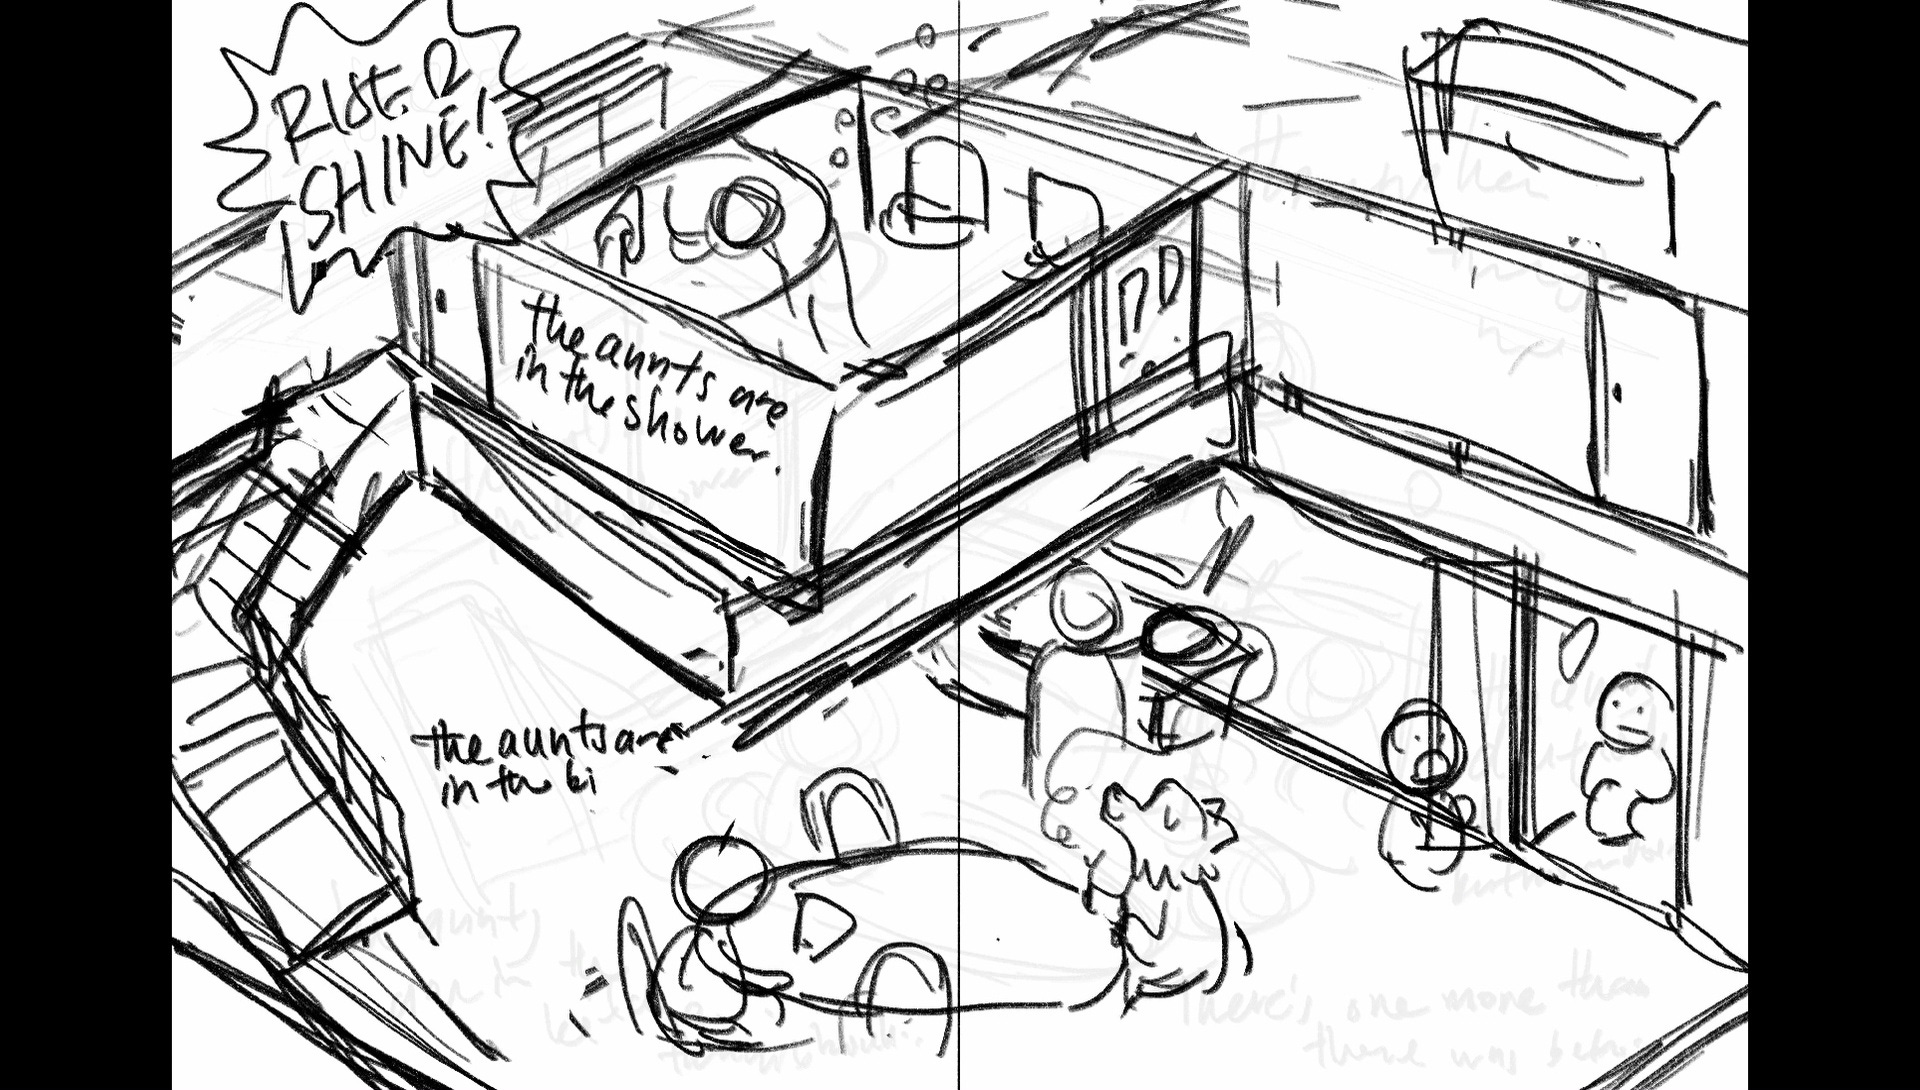
Step 3: Try out a different perspective

I felt like the perspective wasn’t “legit” in the first sketch so I tried out a version where I used the perspective tool in Procreate but it just looked so weird. It could also be that I’m just not great at understanding perspective.
Step 4: Realize it’s not working and go back to original perspective
So I went back to the old perspective which was just me winging it and drawing it to my heart’s desire.
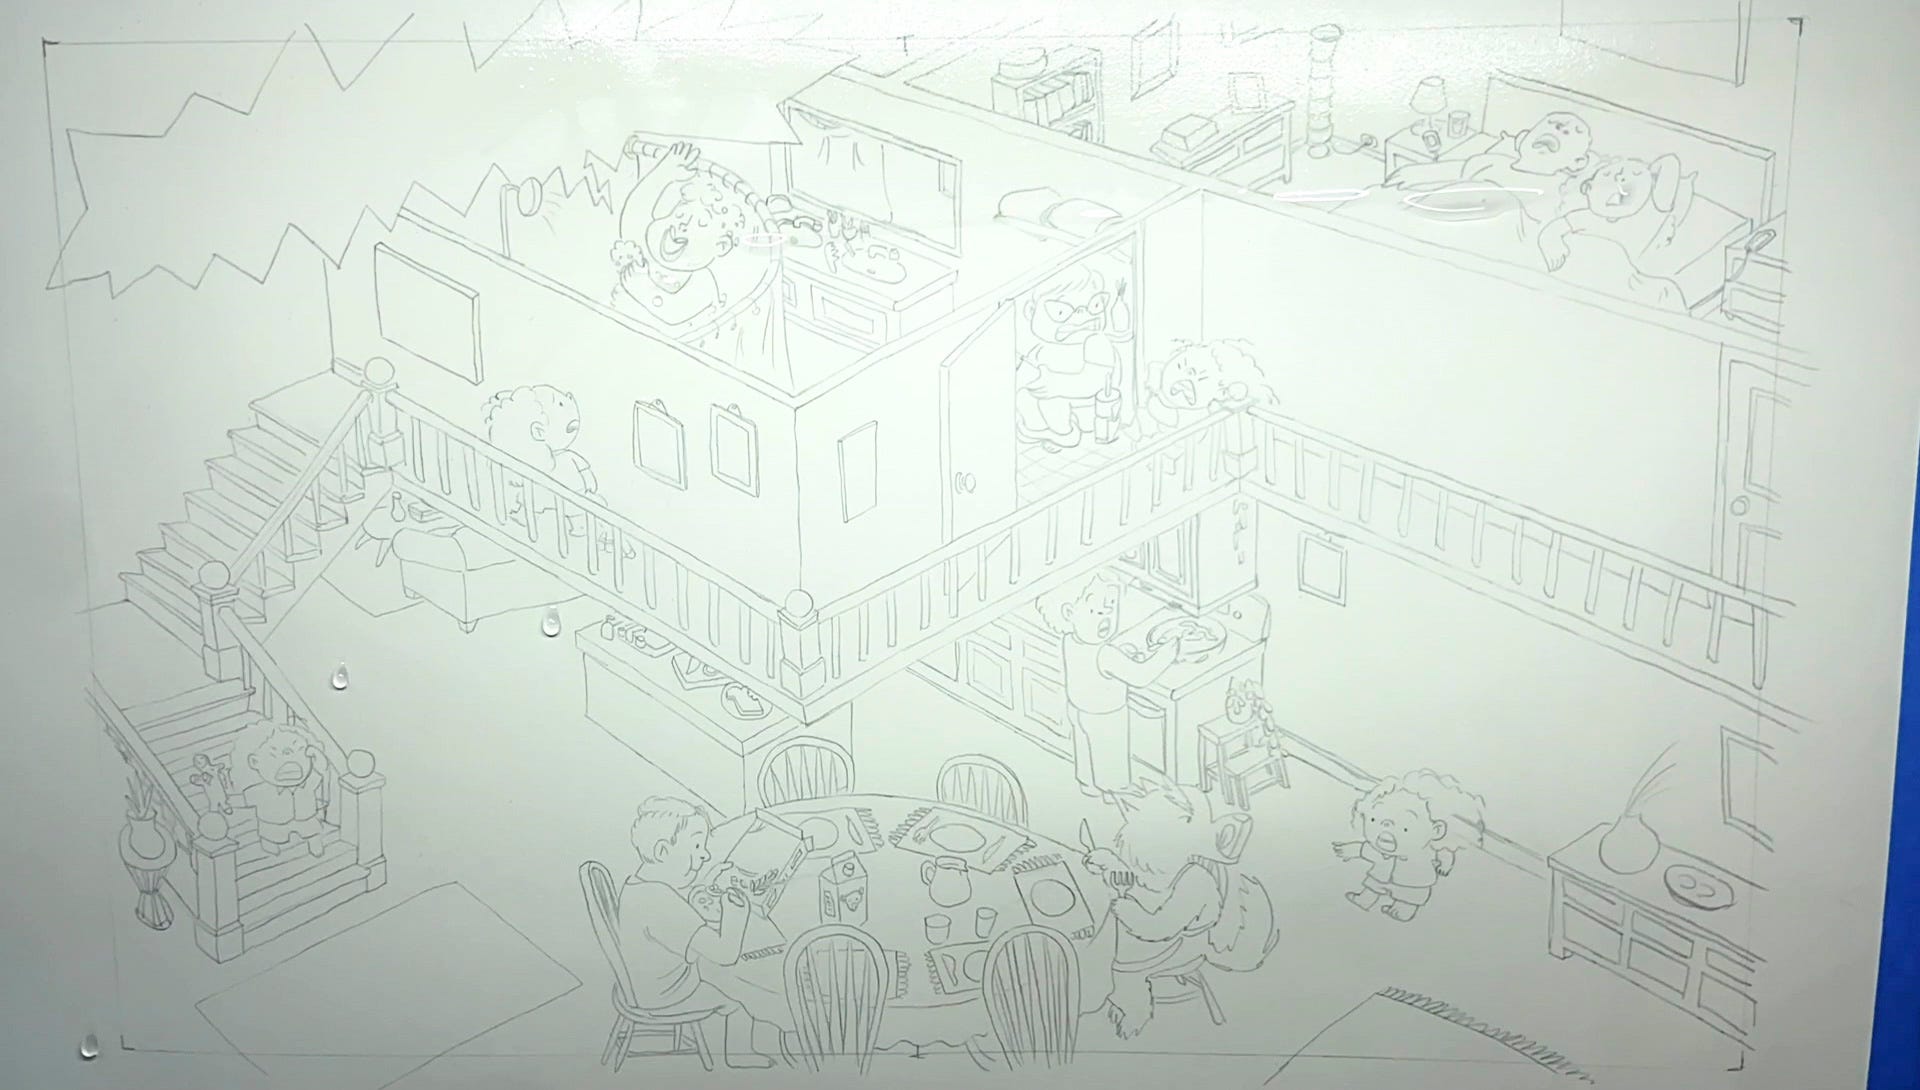
Step 5: Tighten up the sketch and send it over

This is the first sketch that I sent over to my editor and art director.
Step 6: Get notes back and revise the sketch
Because the main focus of this page was supposed to the wolf that appears suddenly in the house (bottom right), my editor and art director felt that the original placement of the aunt on the toilet distracted from the reveal. So I moved the aunt upstairs instead. This overall sketch took over 20 hours in the end!
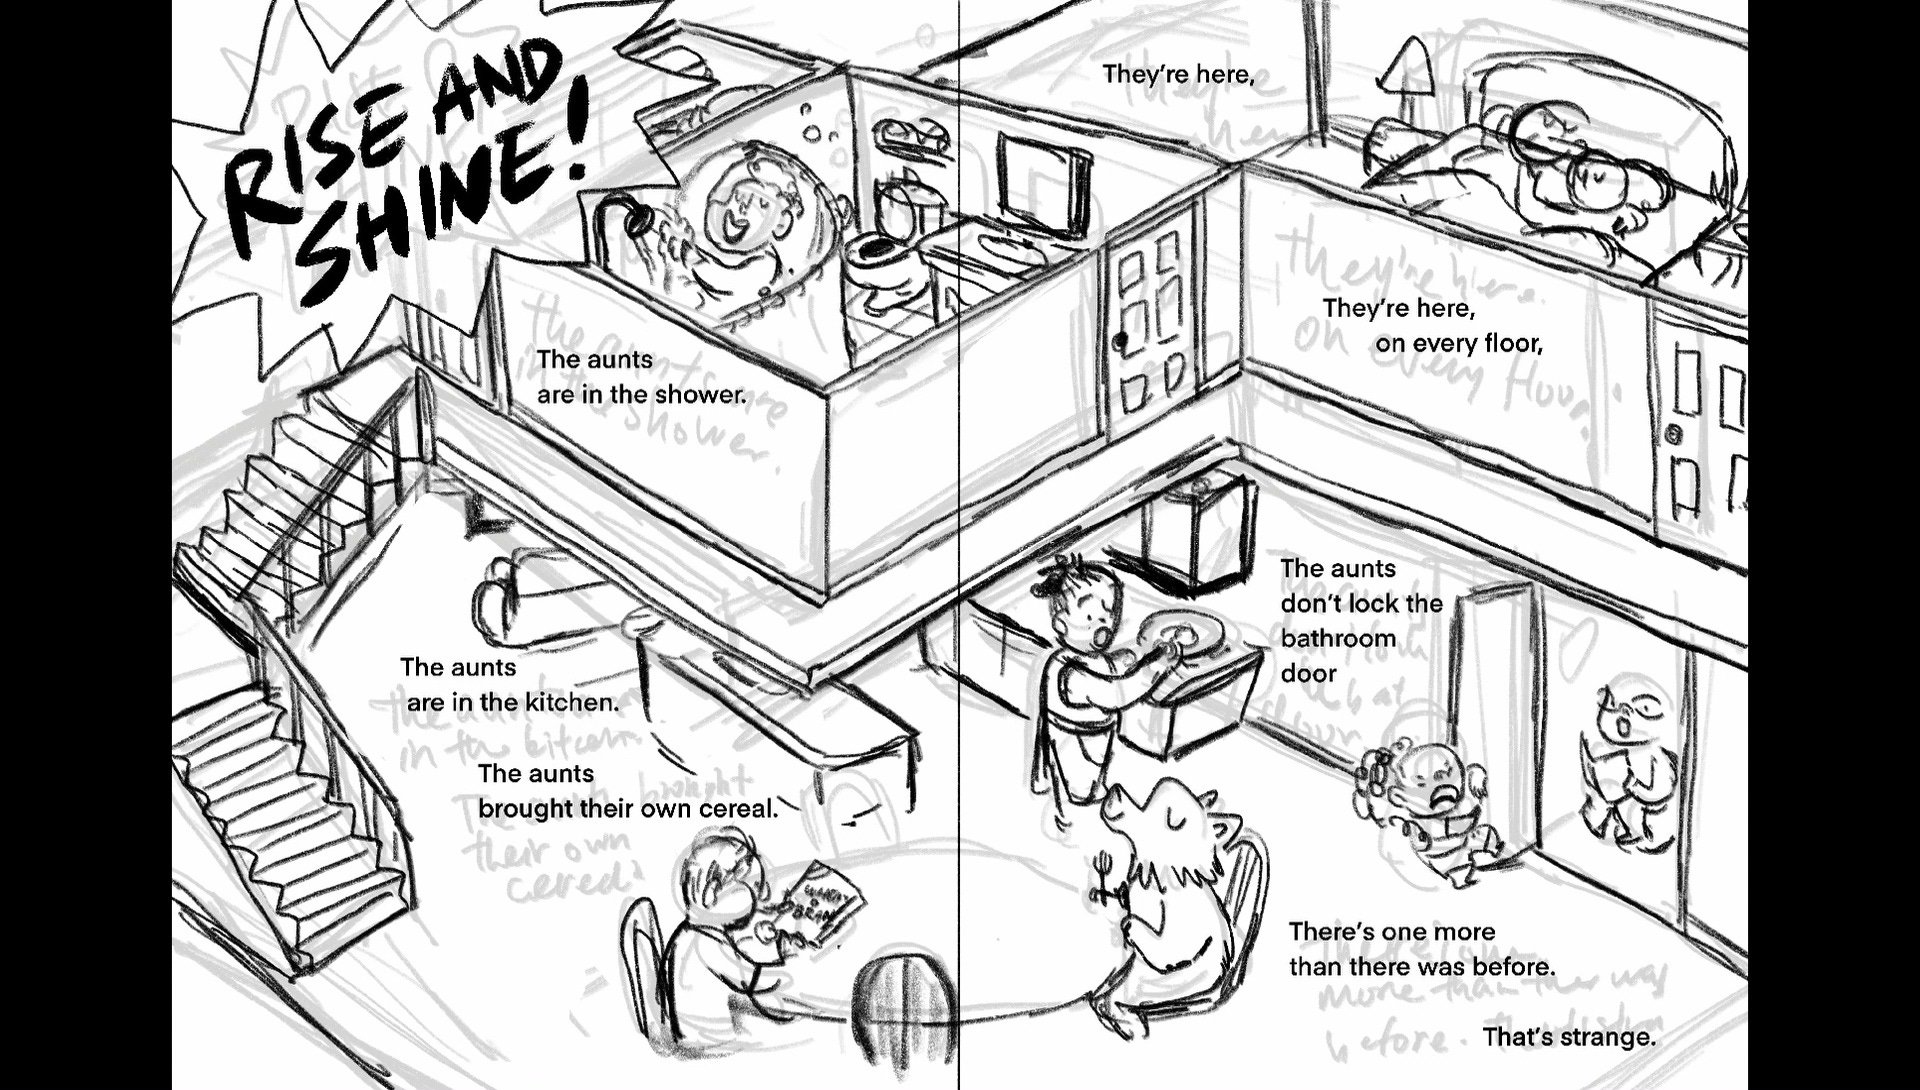
Step 7: Digital color study
After the sketch is approved, I work on a digital color study on Procreate. I always do a color study because I find that it makes the entire painting process way easier down the line. I don’t spend time worrying about what color goes where and messing up the whole thing if I can follow along on a color study. This is especially important with watercolor because it can be difficult to correct mistakes with watercolor.
Step 8: Transfer the sketch to watercolor paper
After the sketch is approved, I then print out the digital sketch to size. Using a lightbox, I trace the sketch onto the watercolor paper.
Step 9: Warm/cool wash & tape down areas
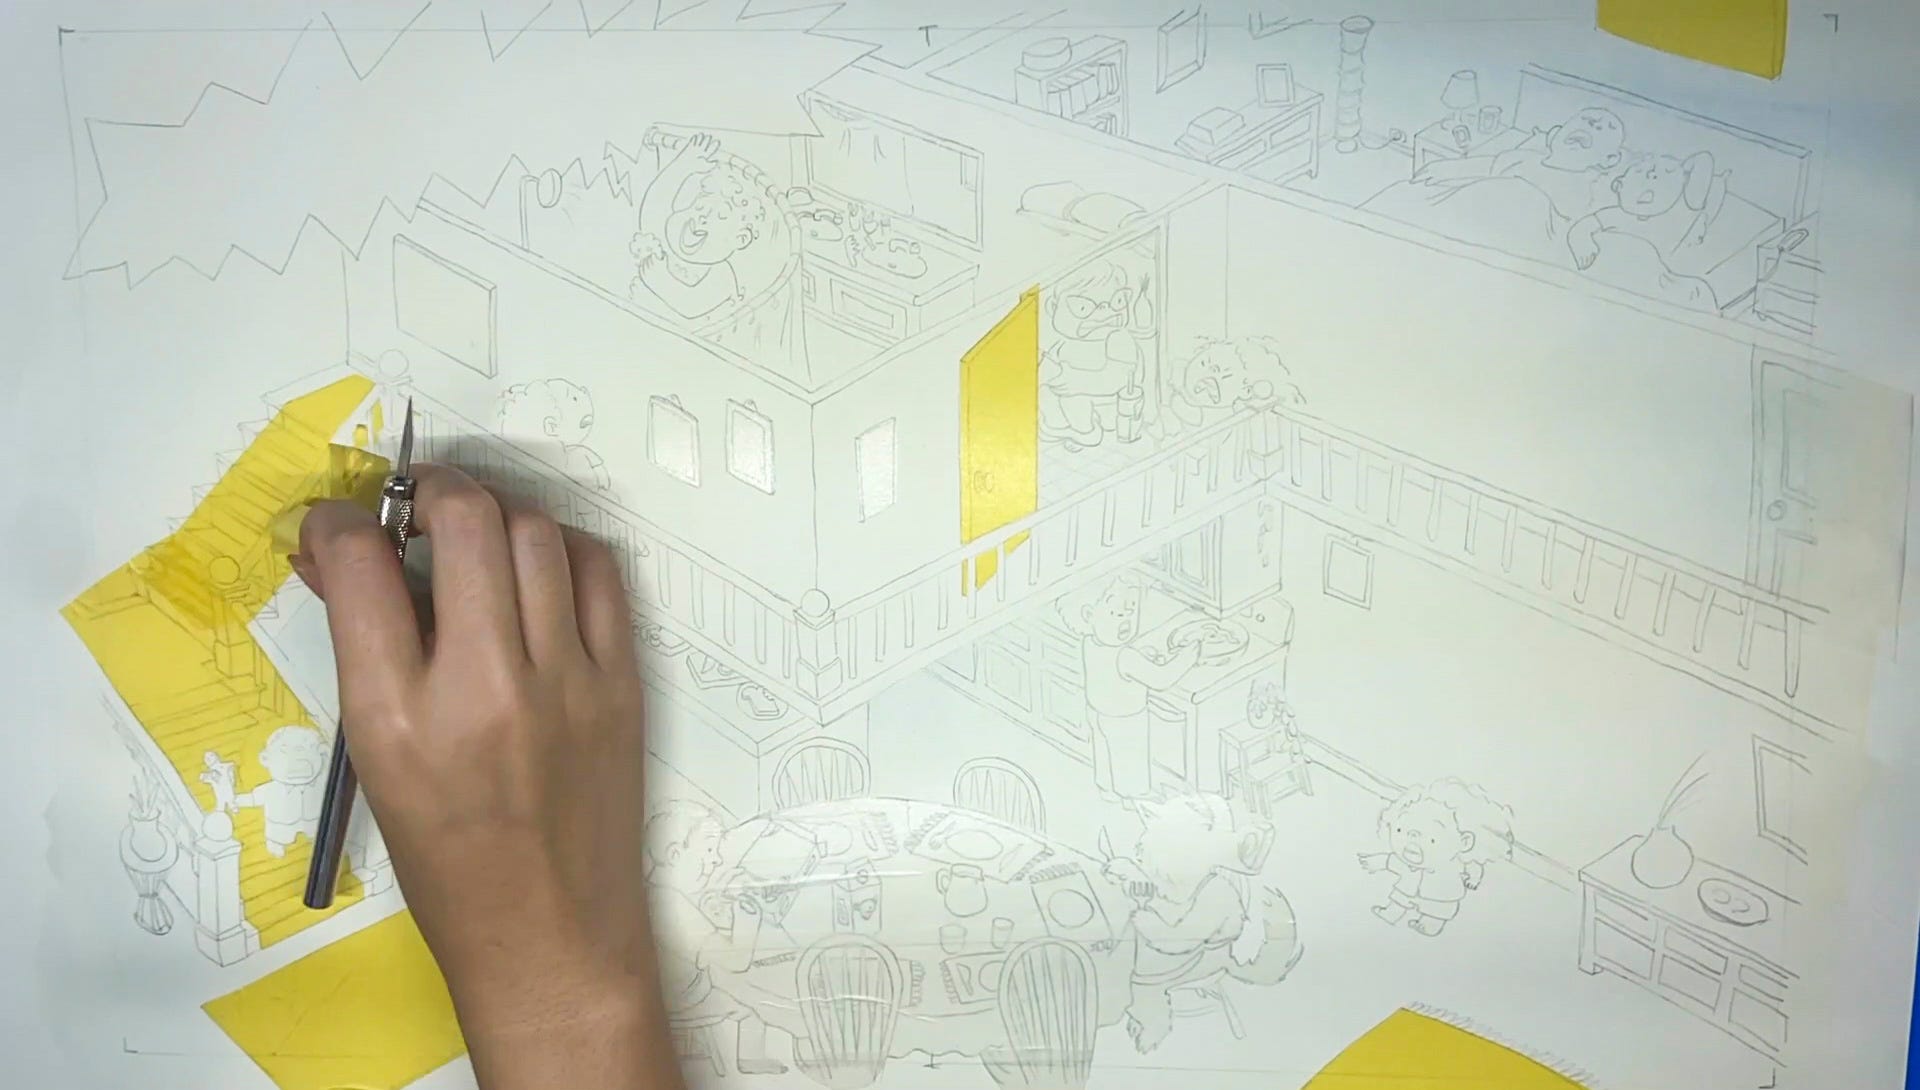
I usually start all my watercolors with a very light base wash to establish lights and darks. It is usually very subtle but I find it helps me get over the mental hurdle of painting on pure white paper.
Using Nichiban tape (a legendary Japanese masking tape), I go in and tape off areas that I want to keep the paint out of. Because I am painting with hot press watercolor paper, the paint tends to dry quickly. If I spend too much time painting around objects, the paint begins to dry and I end up with a really patchy wash on the large areas which I find really distracting. Cold press paper tends to dry slower because it is textured and has lots of little nooks which the paint and water can rest in versus hot press paper which is entirely smooth.
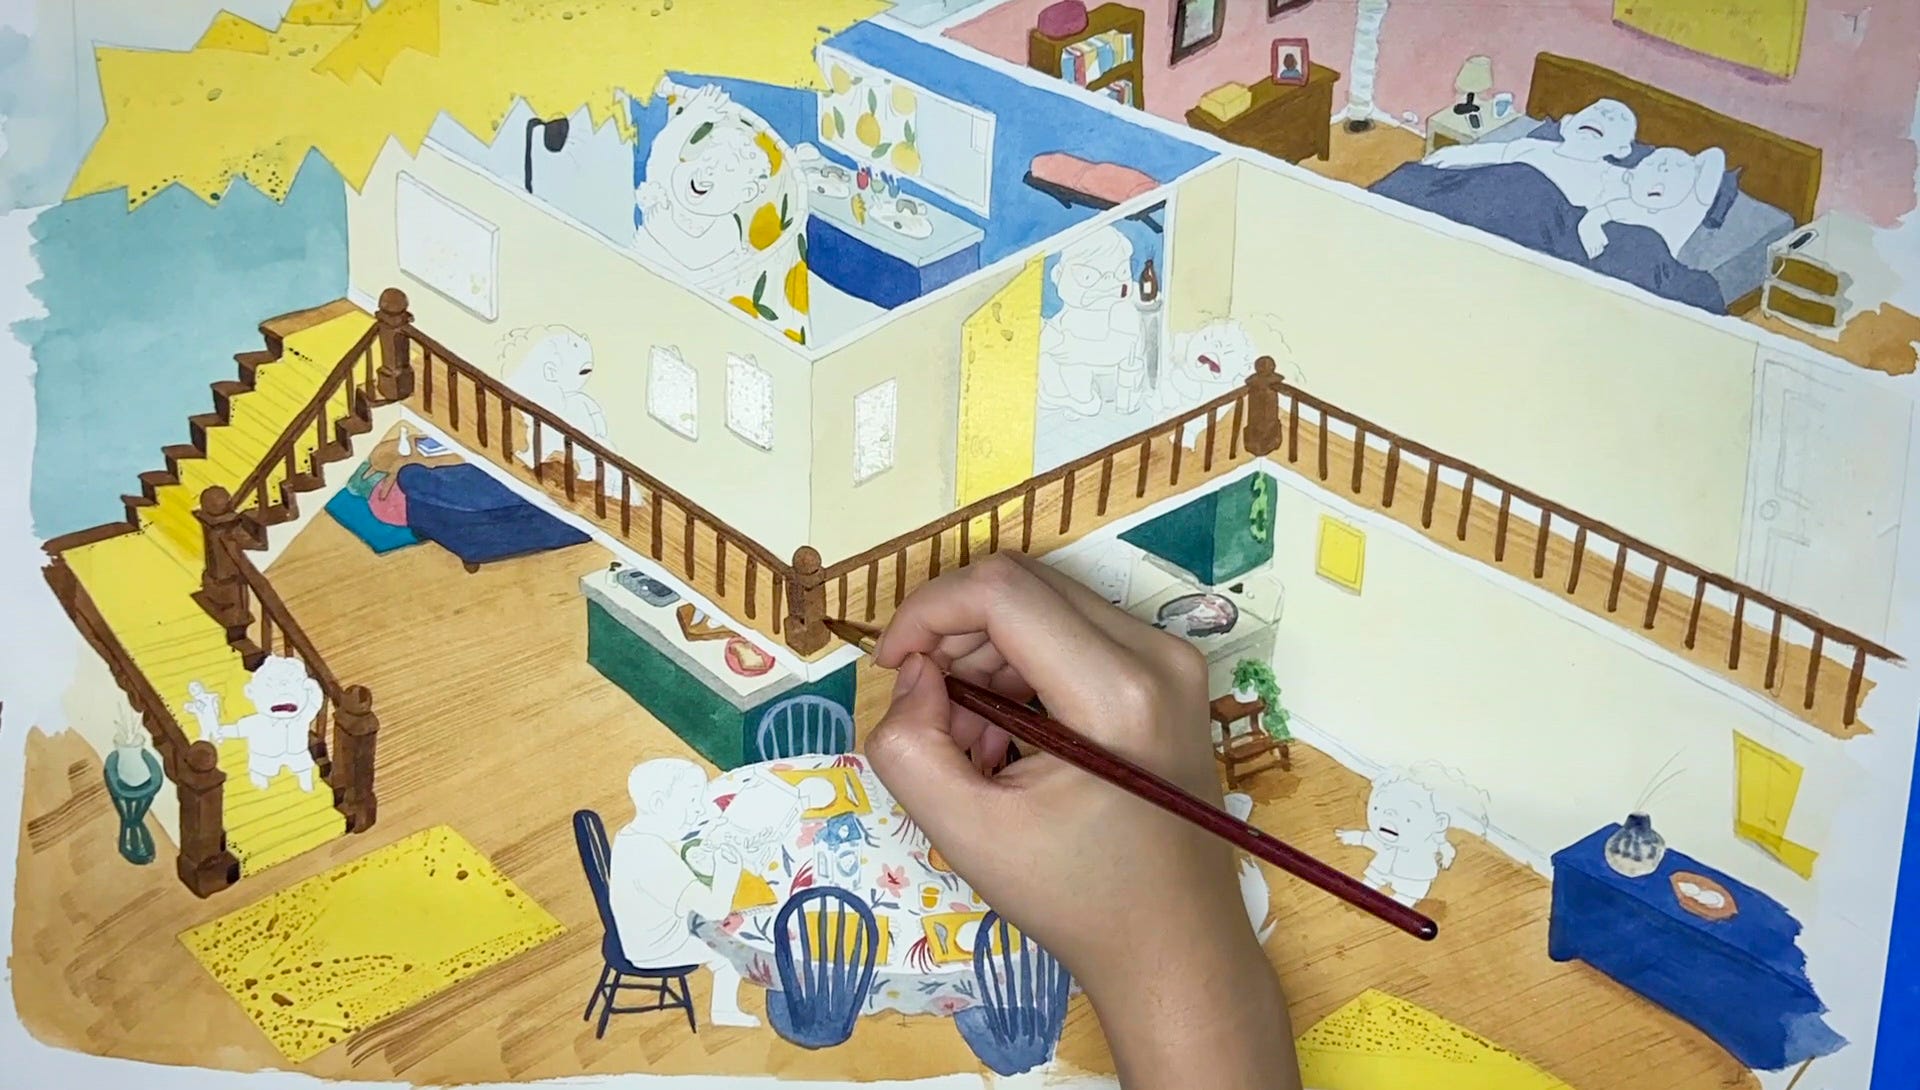
Step 10: Start painting large areas
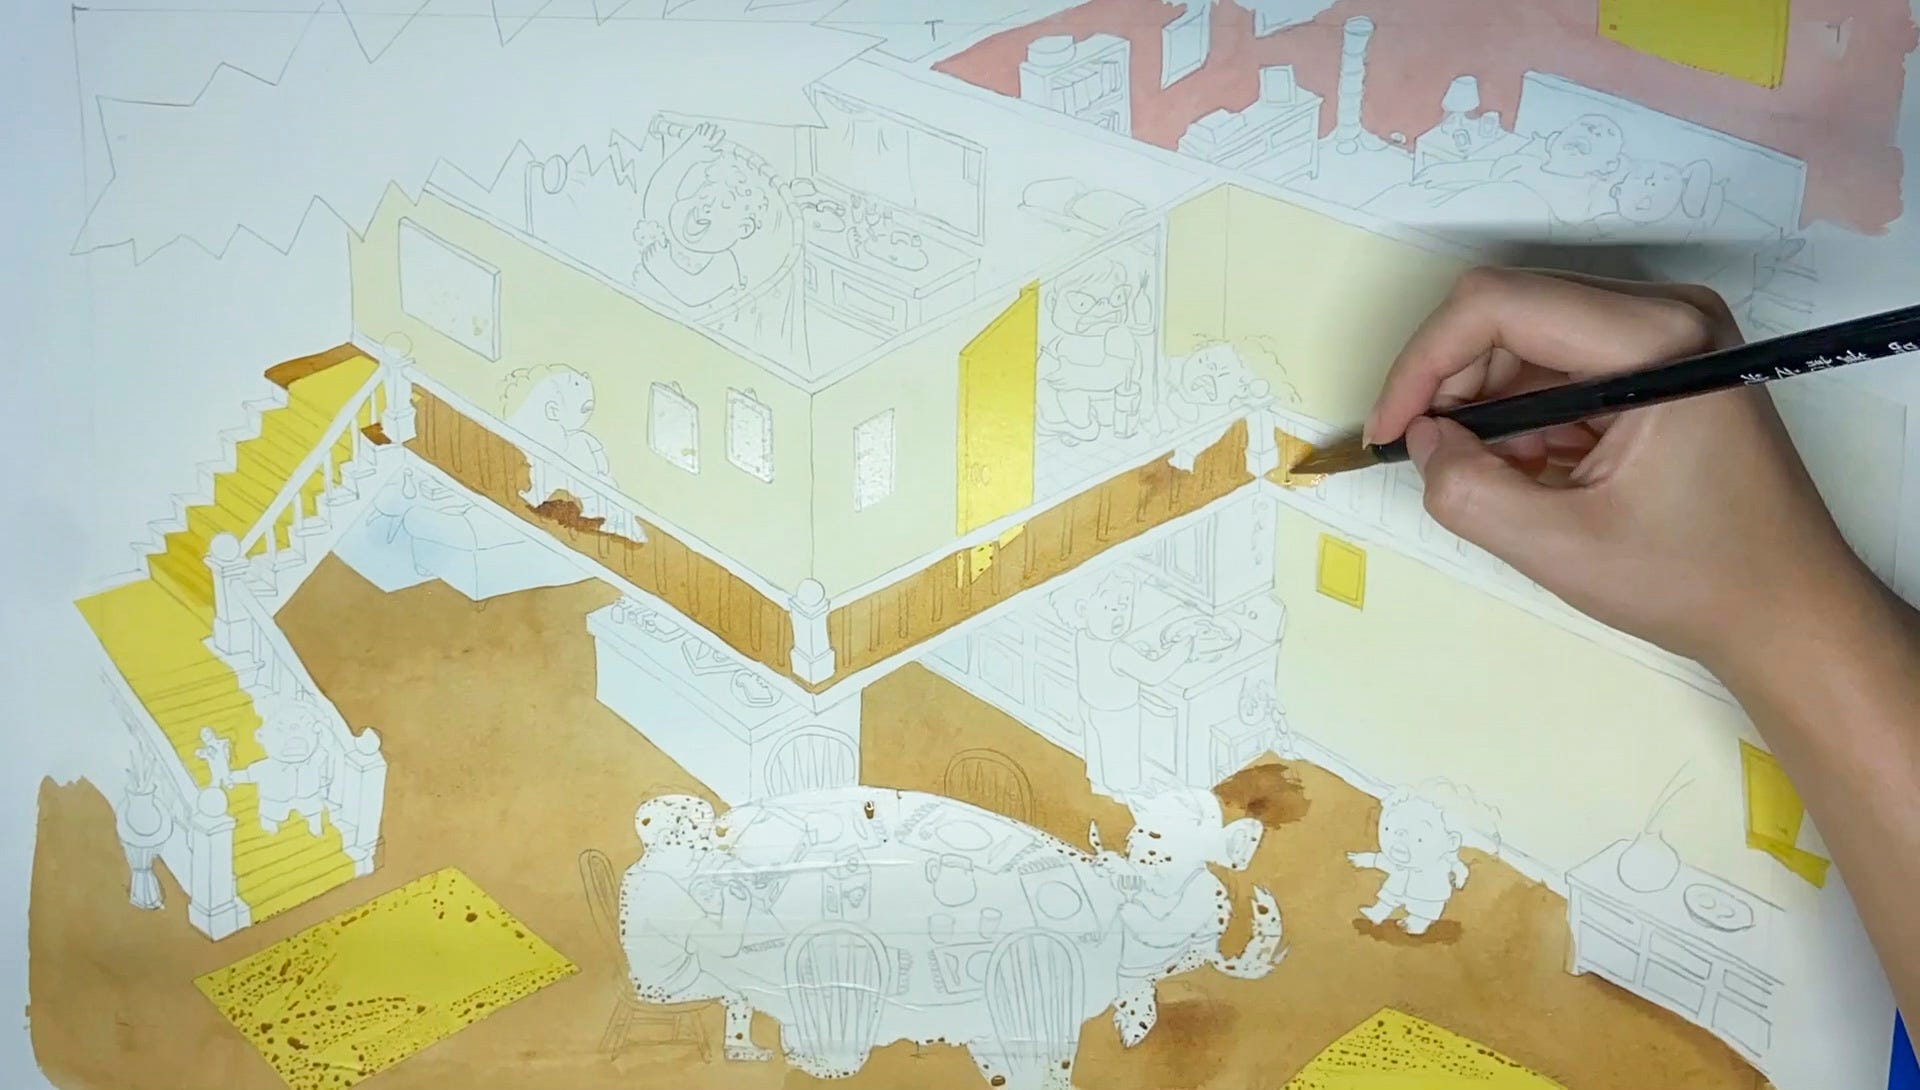
After the taping is done, I start to paint in the large areas. With watercolor, it’s important to go from light to dark, and large to small.
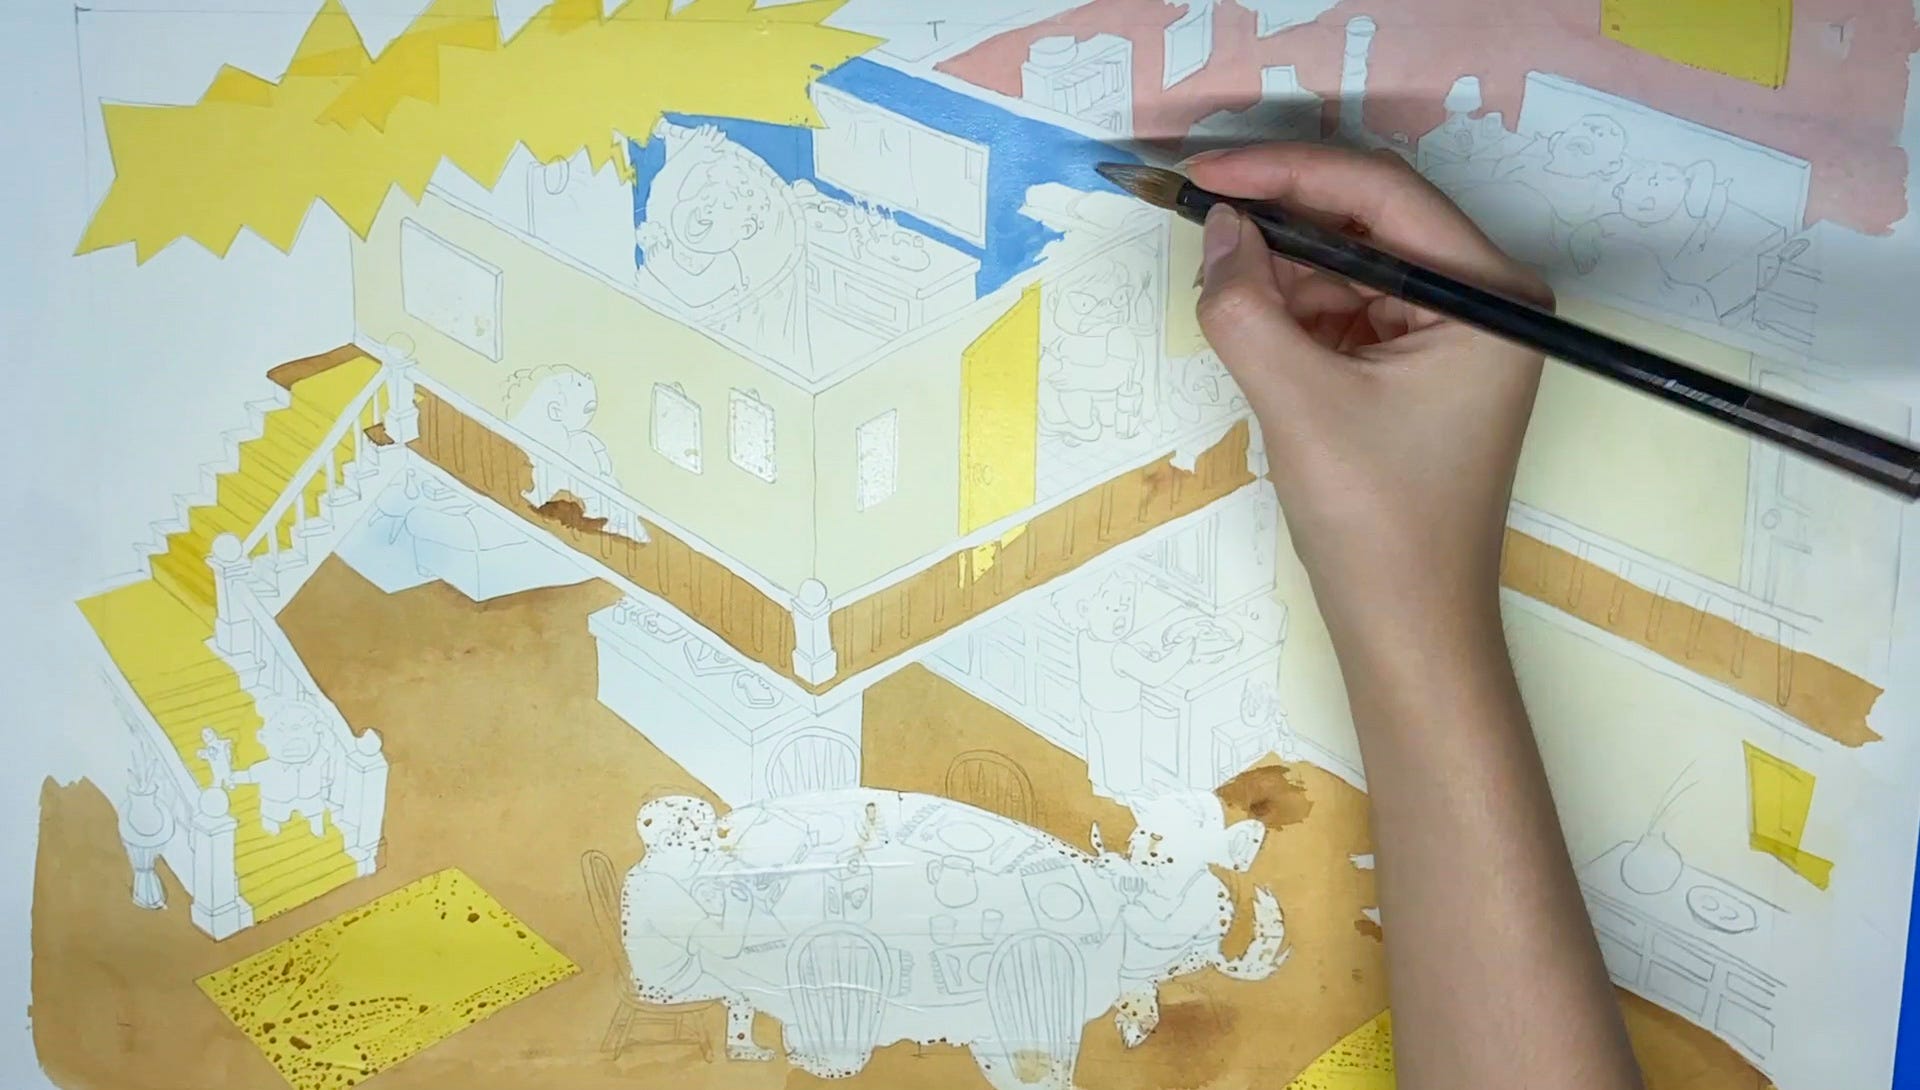
I am using a Chinese calligraphy brush for a large majority of this painting because I really like how much paint and liquid they can hold. They can also hold a very fine point as well as paint really large strokes so I don’t have to use as many brushes. They’re also usually cheaper than a traditional European sable brush more commonly used for watercolor.
Step 11: Move onto smaller areas
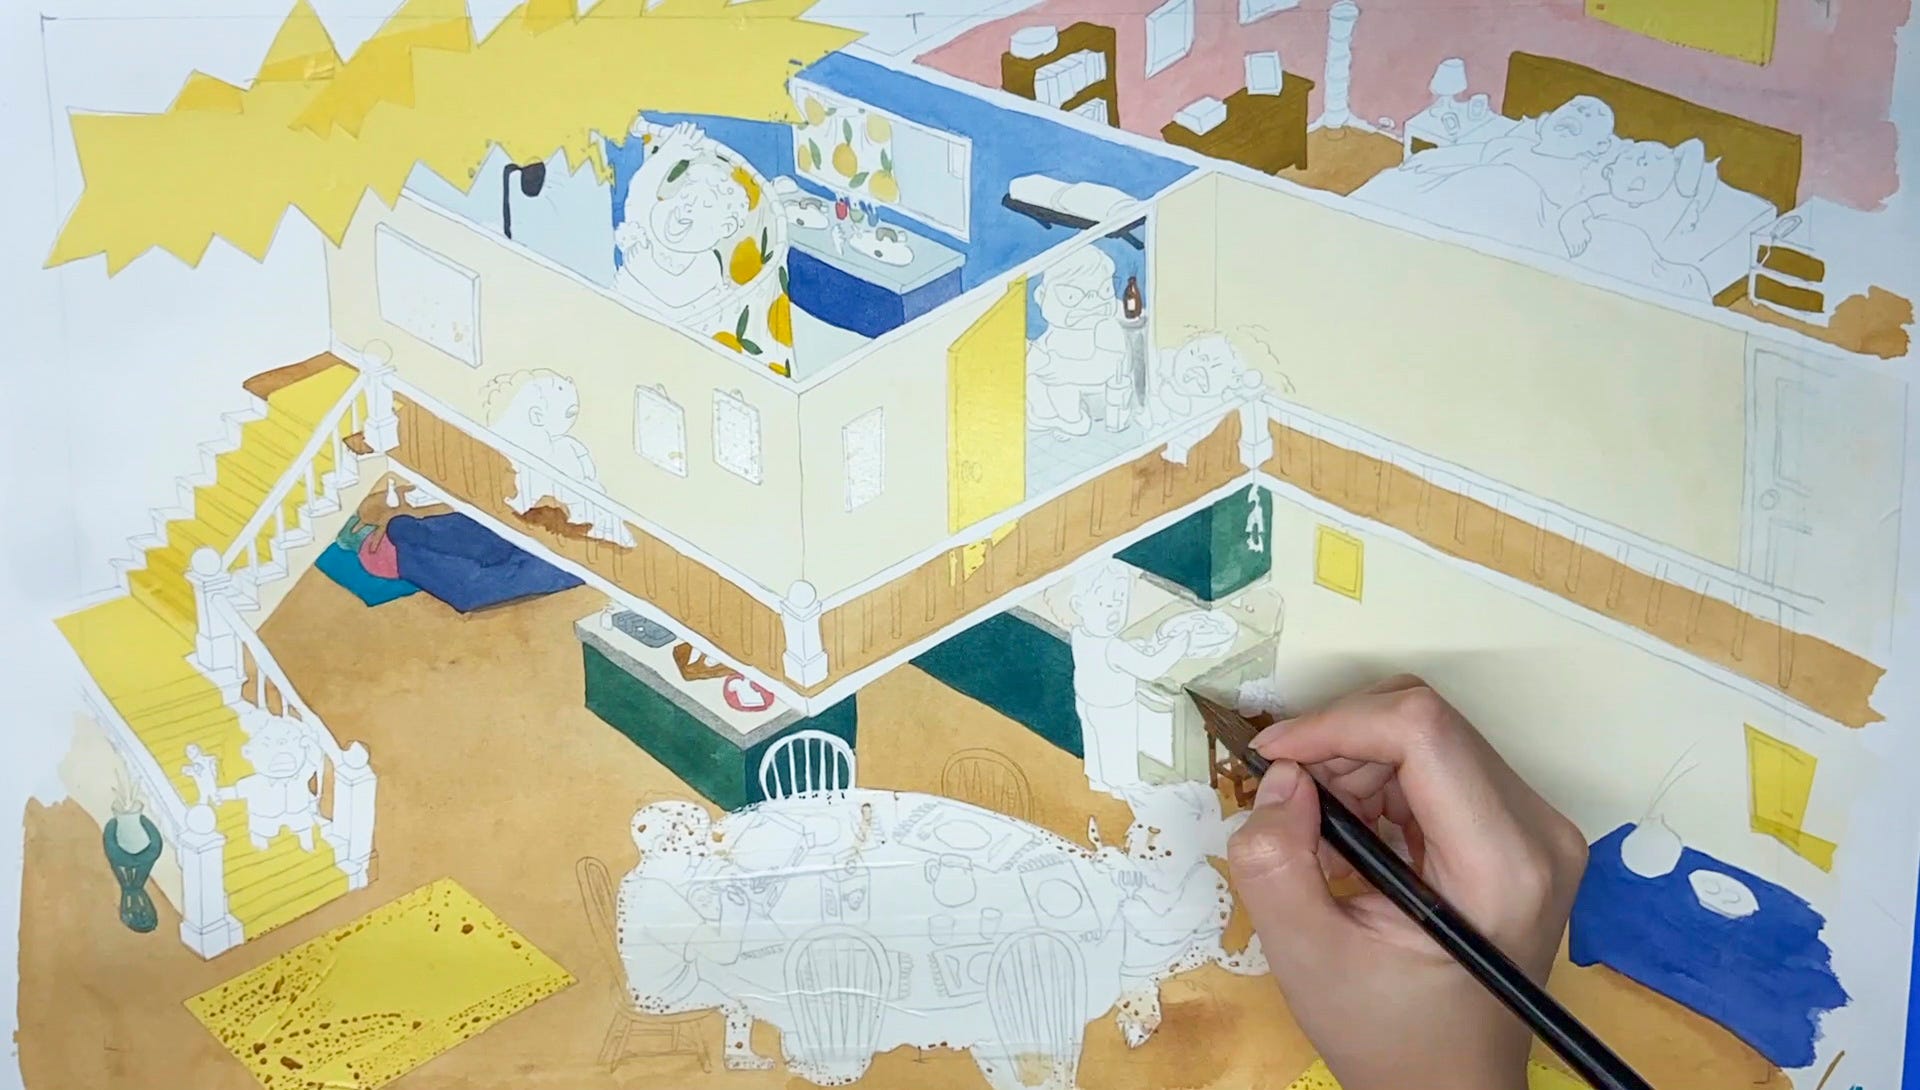
Step 12: Add textures
I add some wood texture to the floor with dry brush.
Step 13: Paint even smaller details
This part is where things start to get very tedious…
Step 14: Lose patience and peel off some tape to feel something again
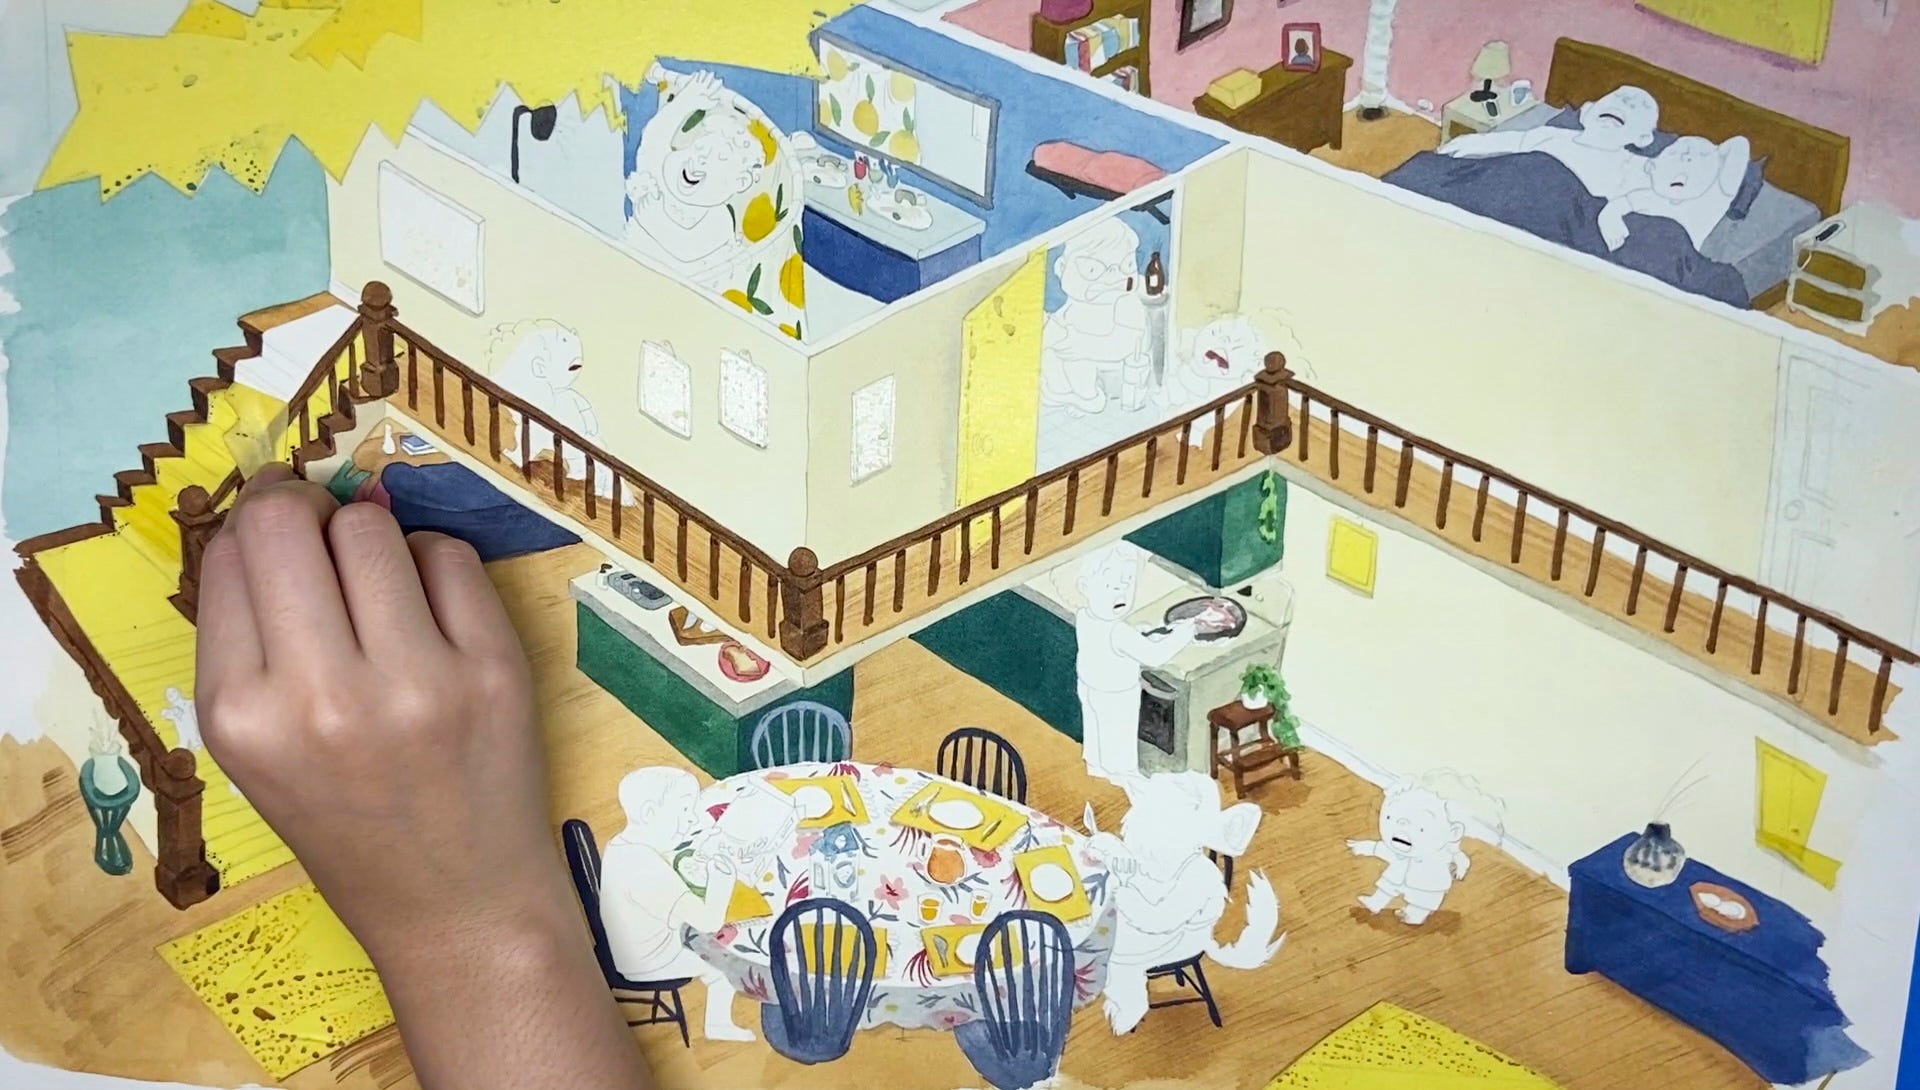
When I lose my patience, I treat myself to my tape peeling which is the most satisfying thing to watch in the world. And you dear reader can watch it happen! In my video below! Wow!
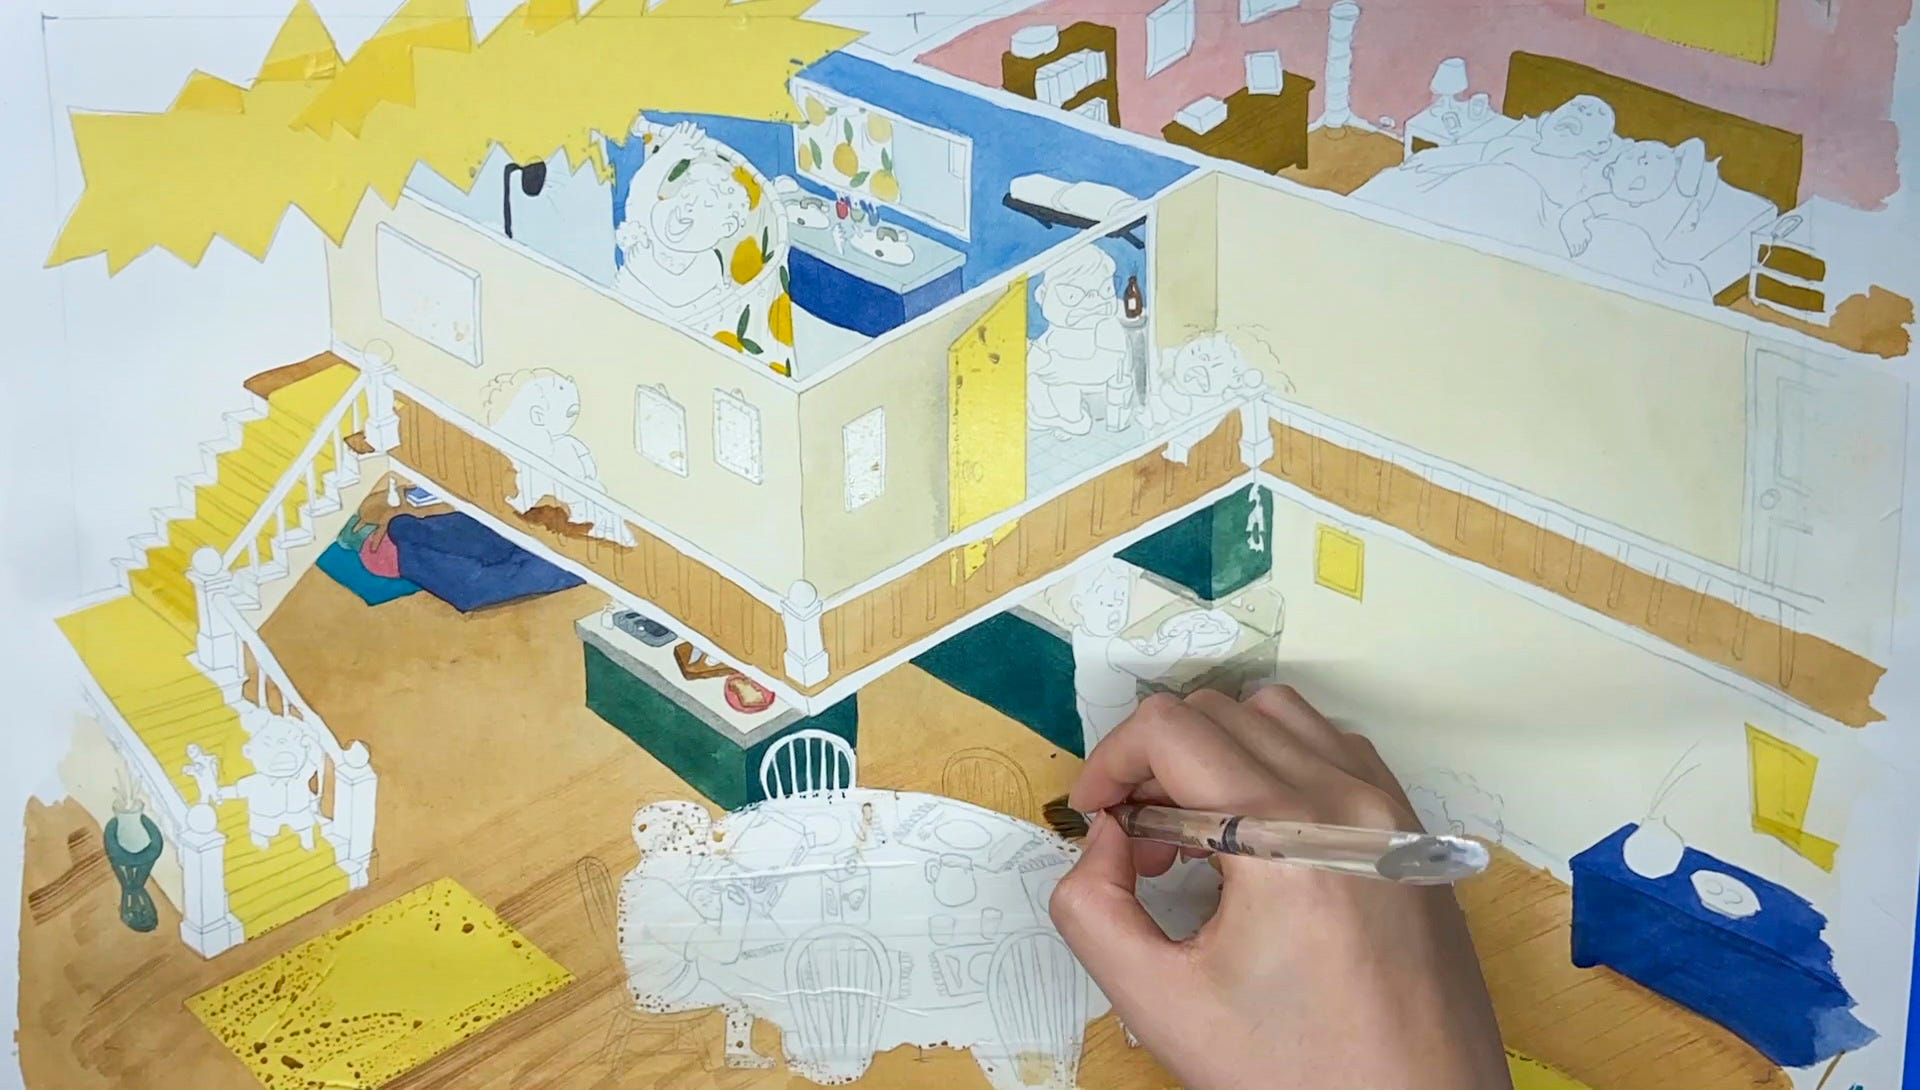
Step 15: Paint characters in gouache
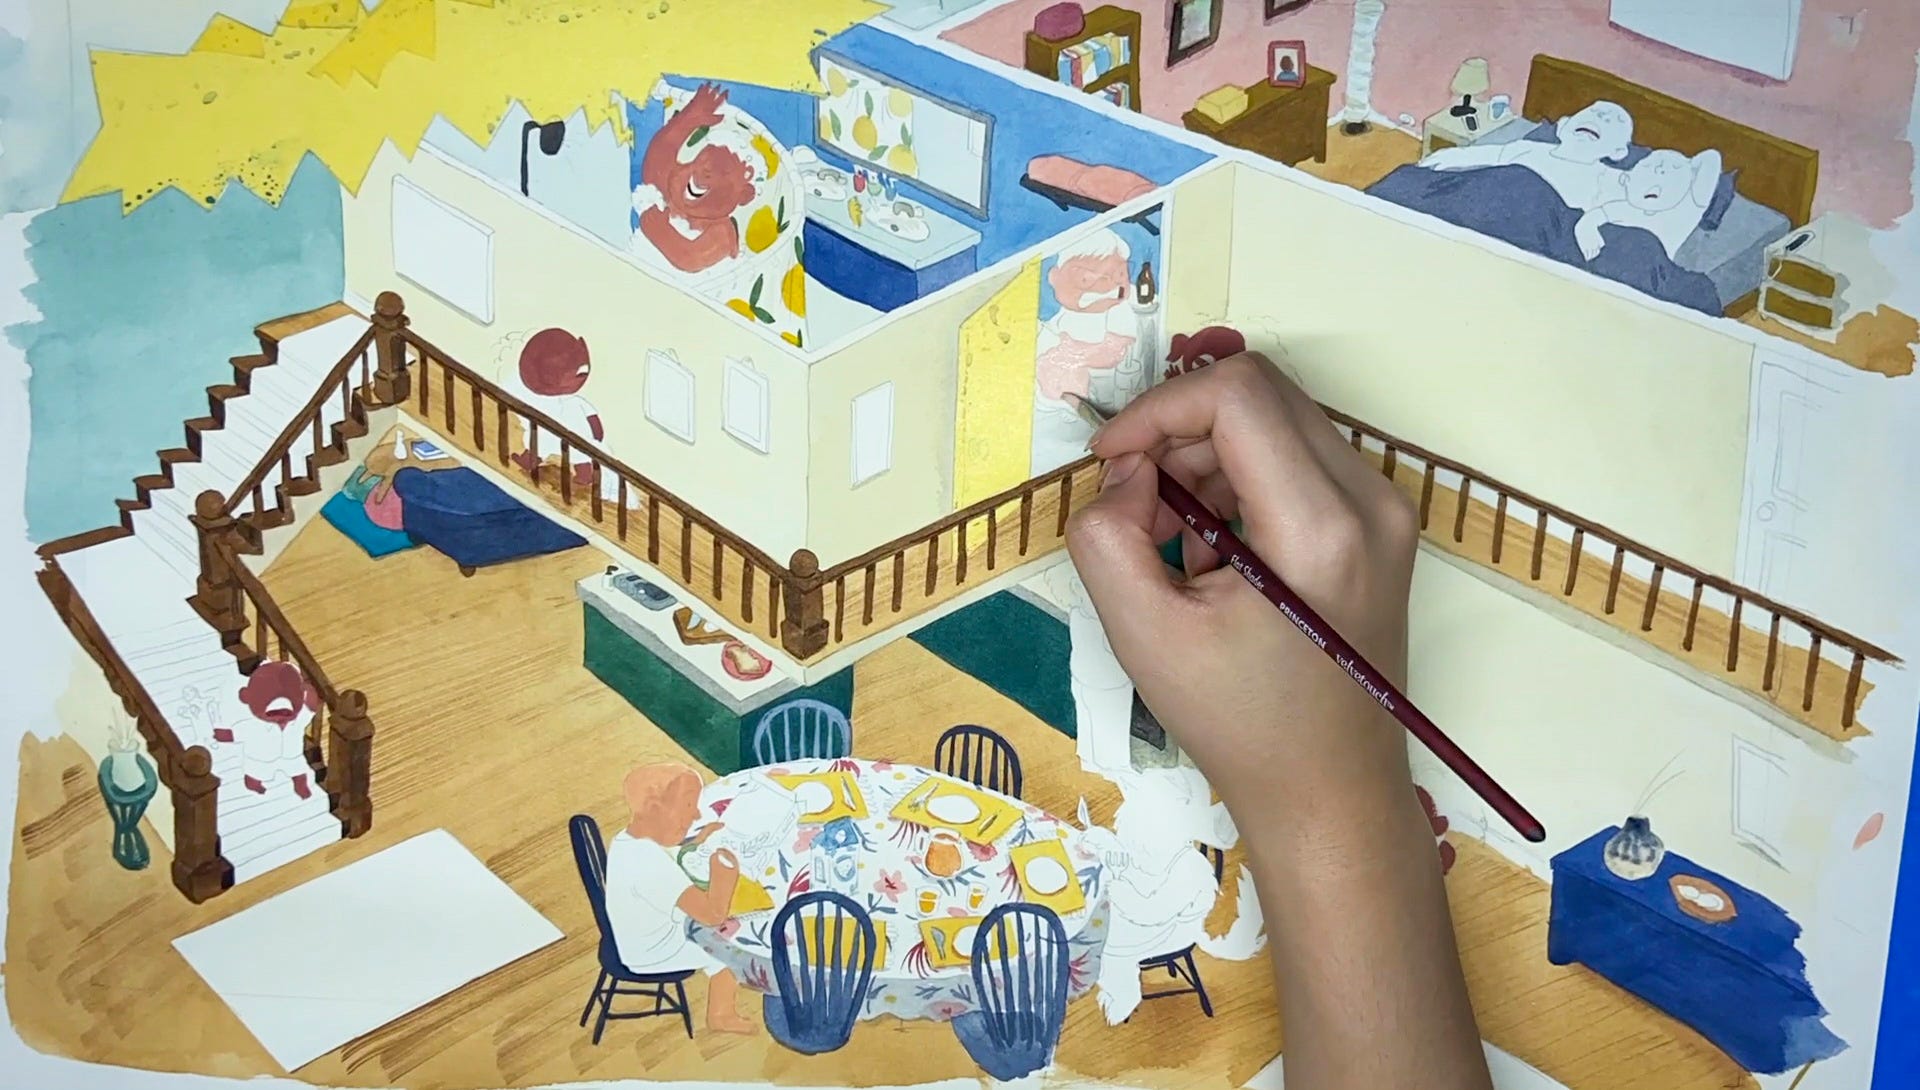
I decided to paint the characters in book out of gouache. For all my books before this, I used purely watercolor and colored pencil but I found that the characters didn’t pop out as much with watercolor so I decided to try using gouache in this book.
Step 16: Paint even more tedious details
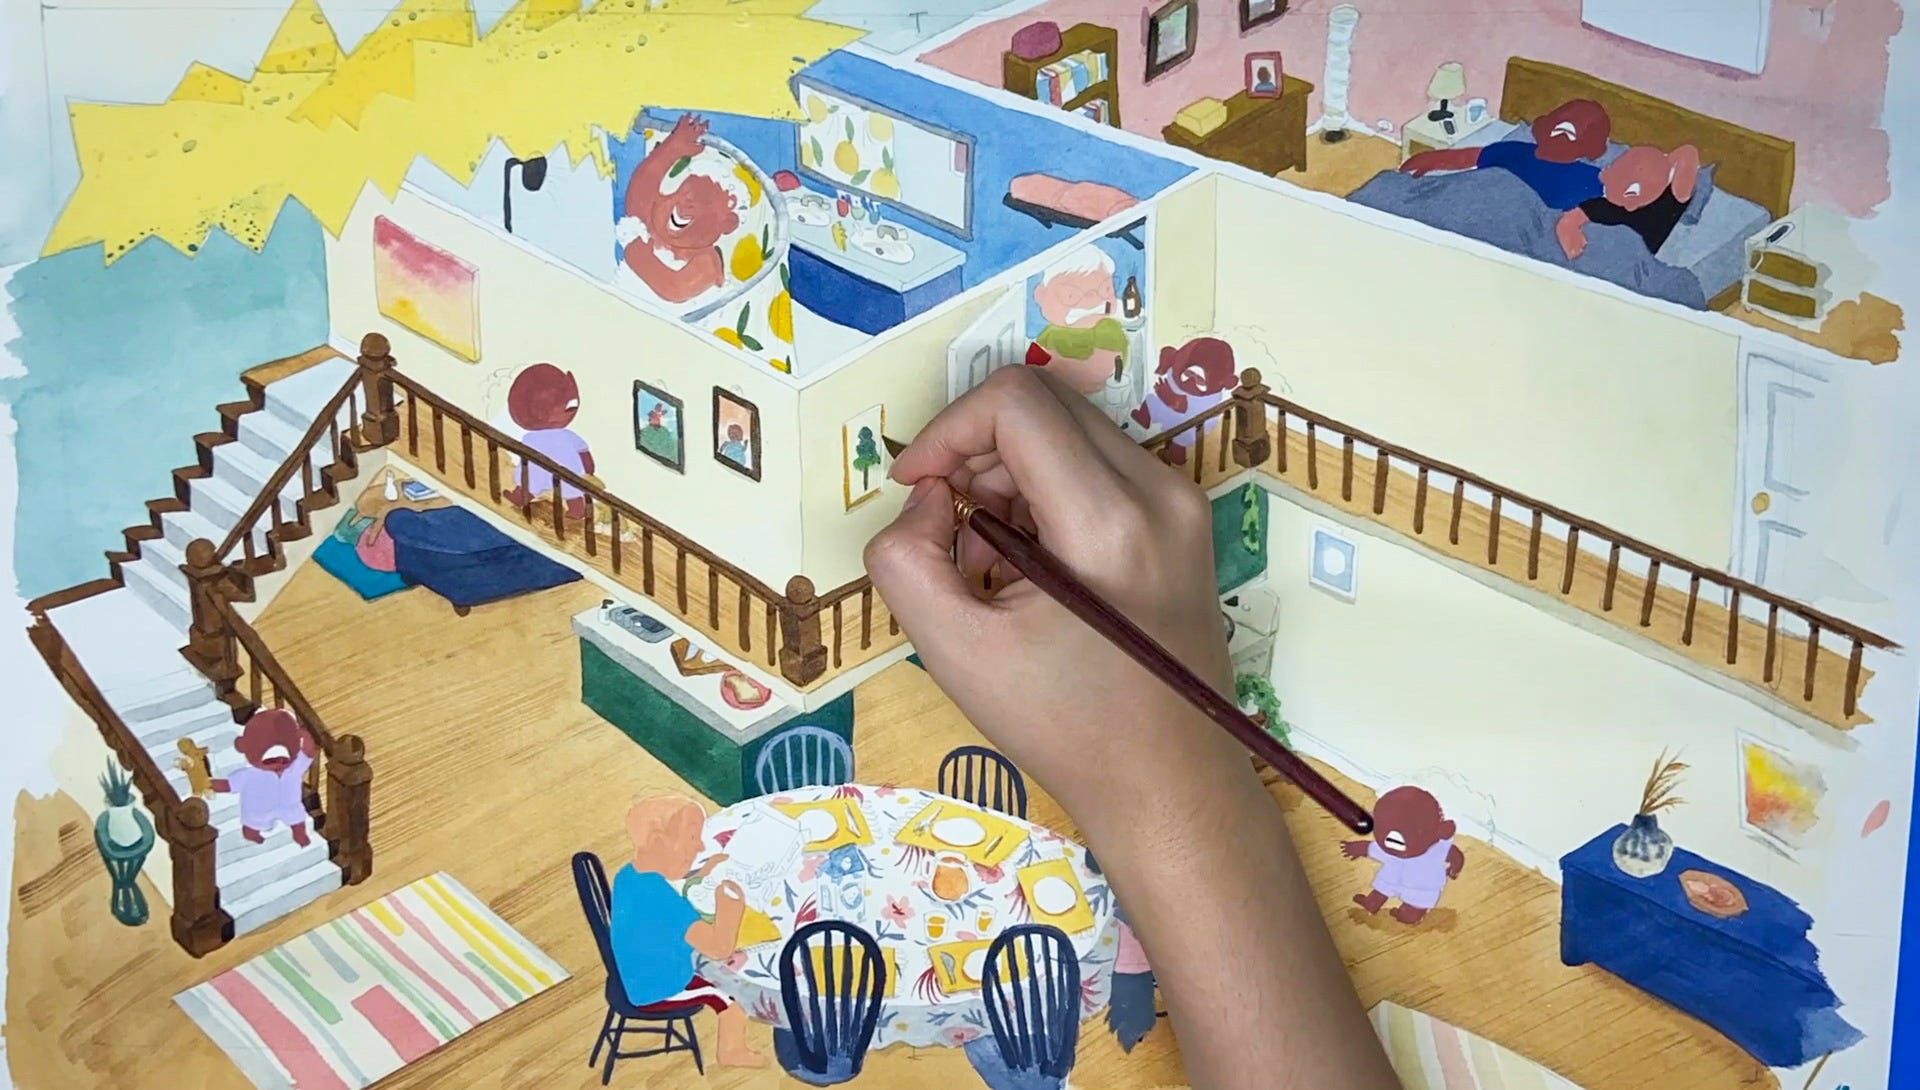
At this point I wanted to die. I could not care less about these tiny paintings and so I did a really bad job painting them which I regret.
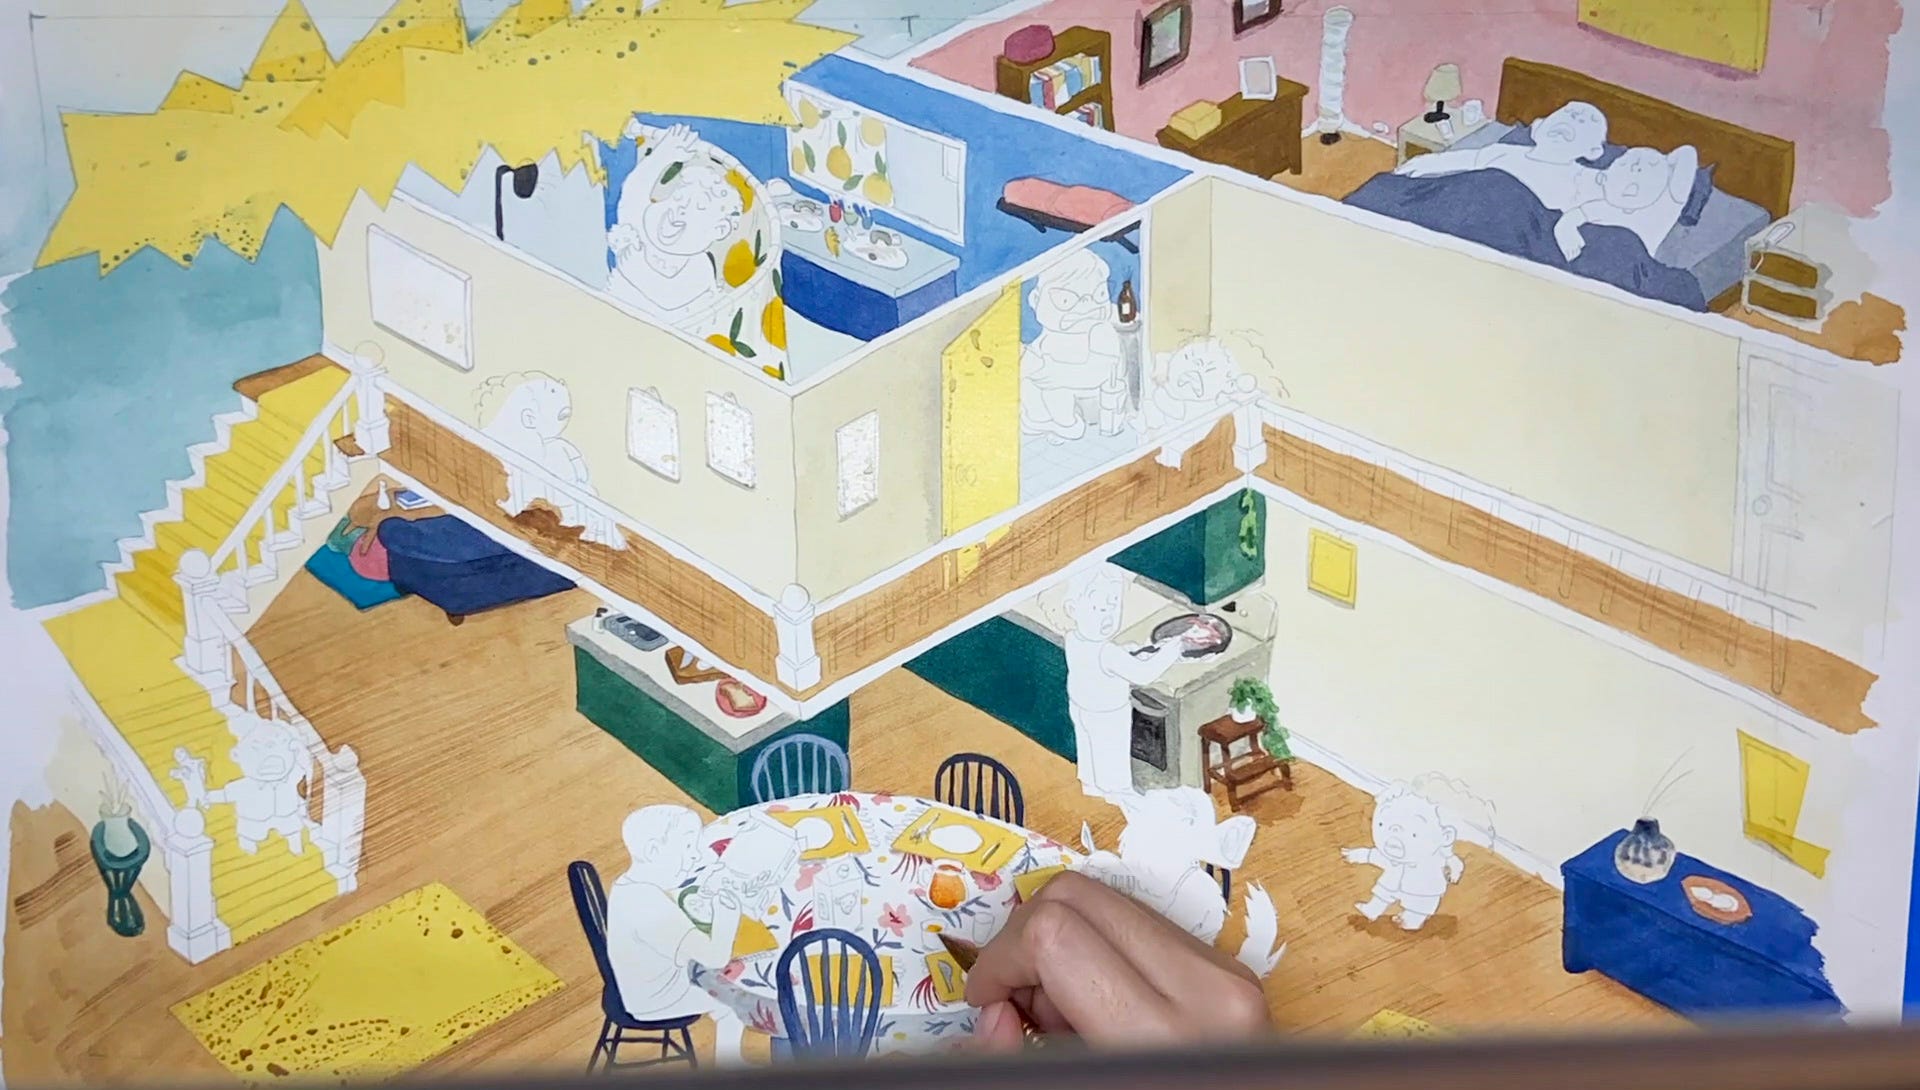
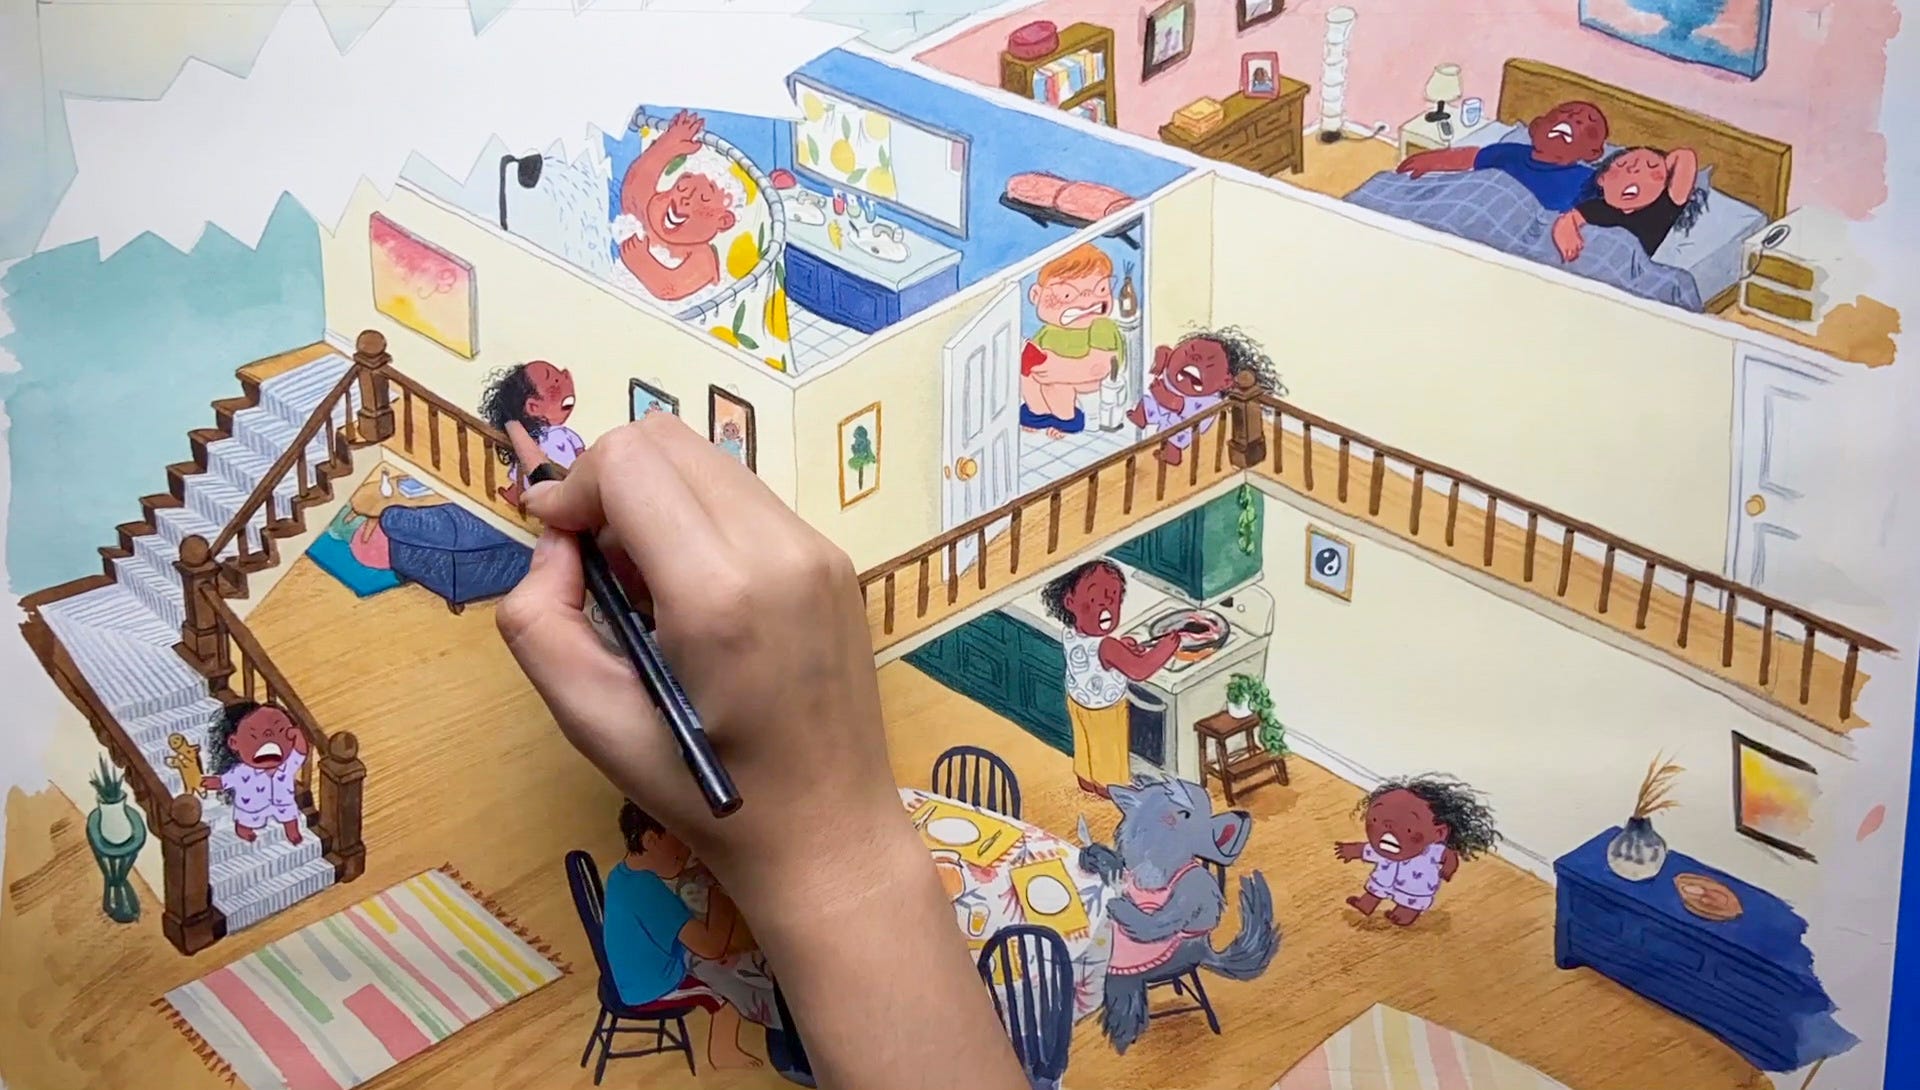
Step 17: Bring in the colored pencils for finishing details

Then it’s my favorite part, bringing in colored pencils! Pretty much the whole time before this I think I’ve made a mistake and this is the worst painting I’ve ever made in my entire life and they will fire me on the spot. Just about every painting I’ve made, I spent about 90% of the time in this mindset because the painting just looks like garbage until the final 10%. I think painting and working on art is just learning to ignore those instincts to abandon something and to just keep on pushing through because it’ll be worth it in the end.
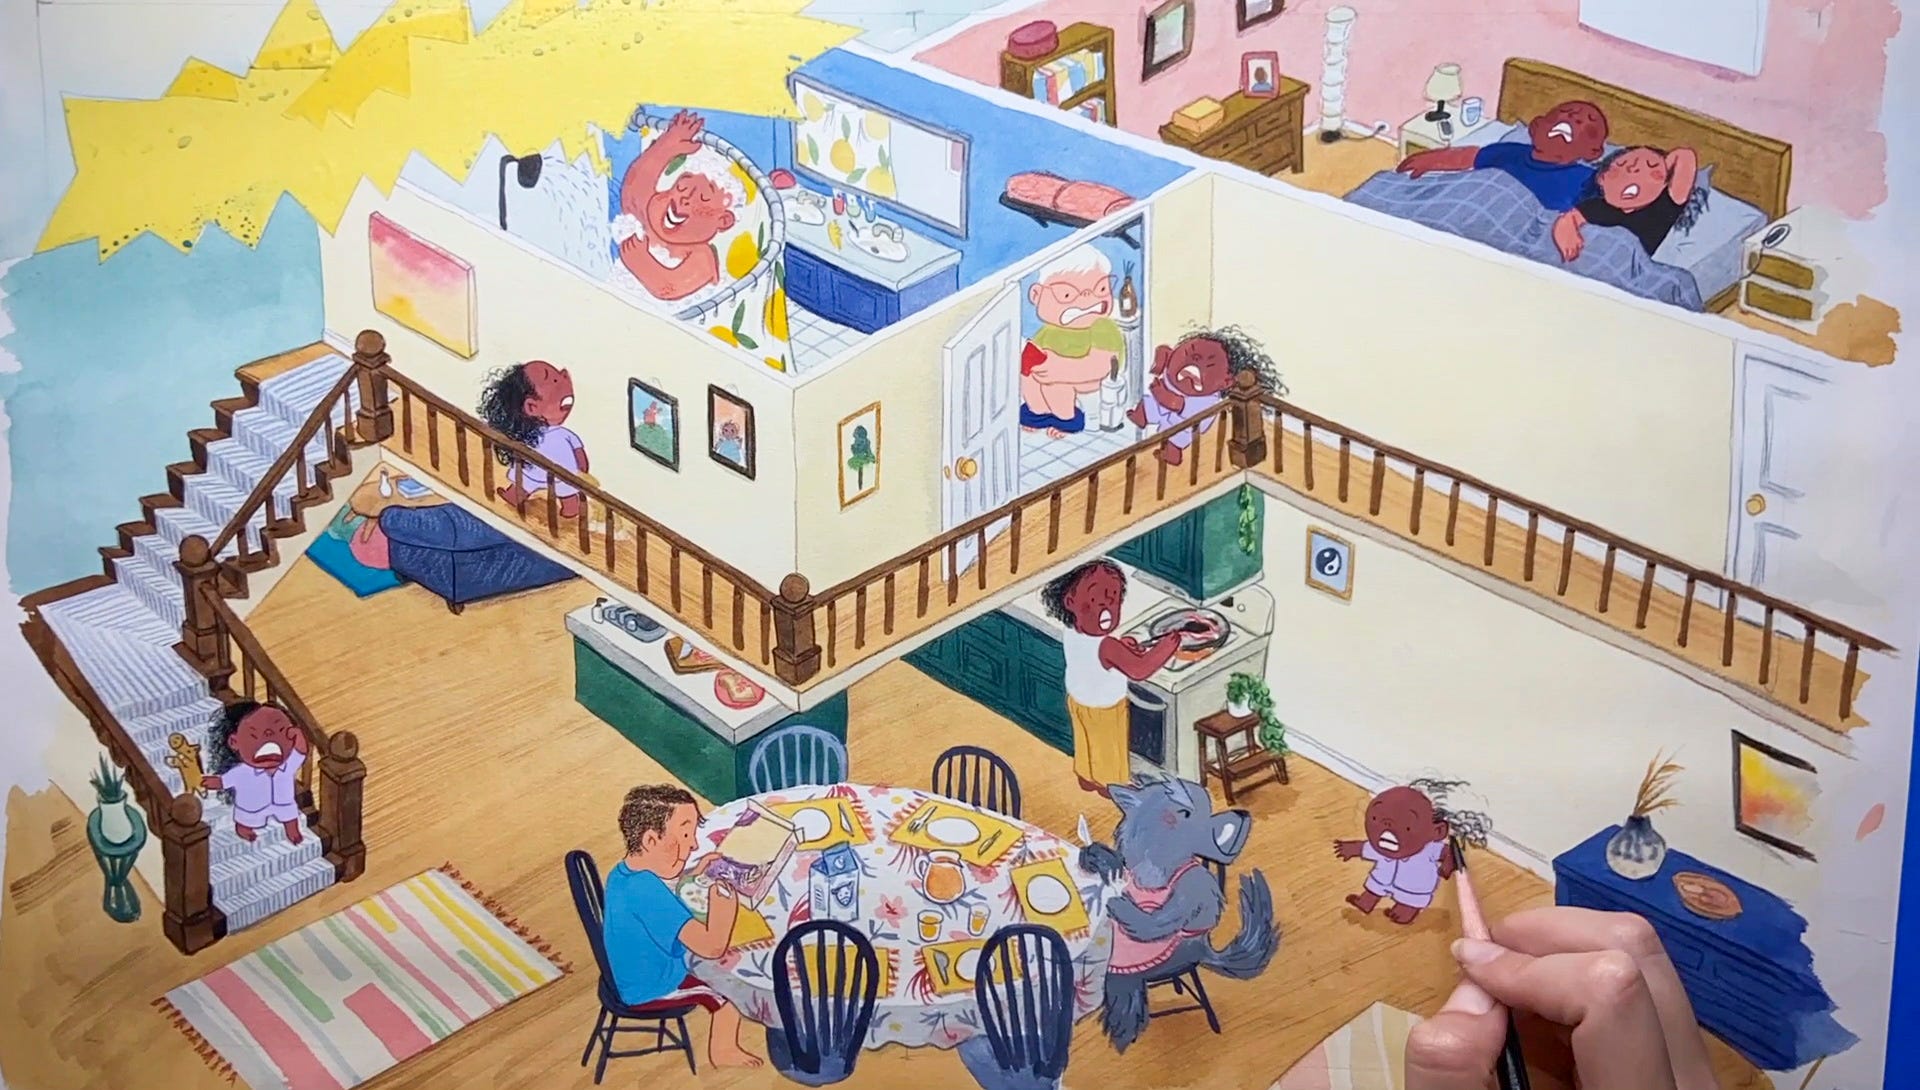
Look at how it’s coming together! I bet you didn’t believe me before when I said this painting would turn out didn’t you?
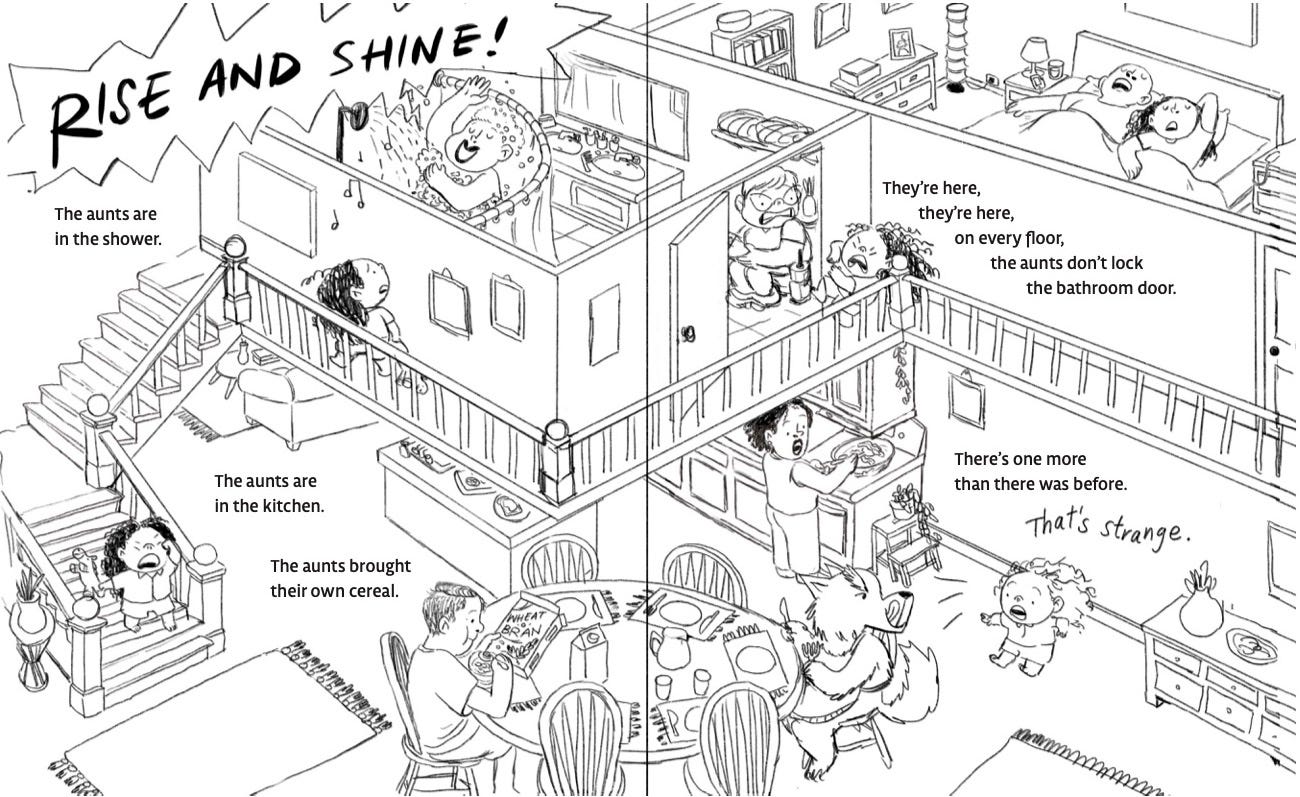
Step 18: DONE!

Then it’s done! I mail in the artwork to be scanned and I add the lettering digitally. My art director then adds the type and it’s a final page! Then this bad boy is printed and we end up with…
Step 19: A printed book!
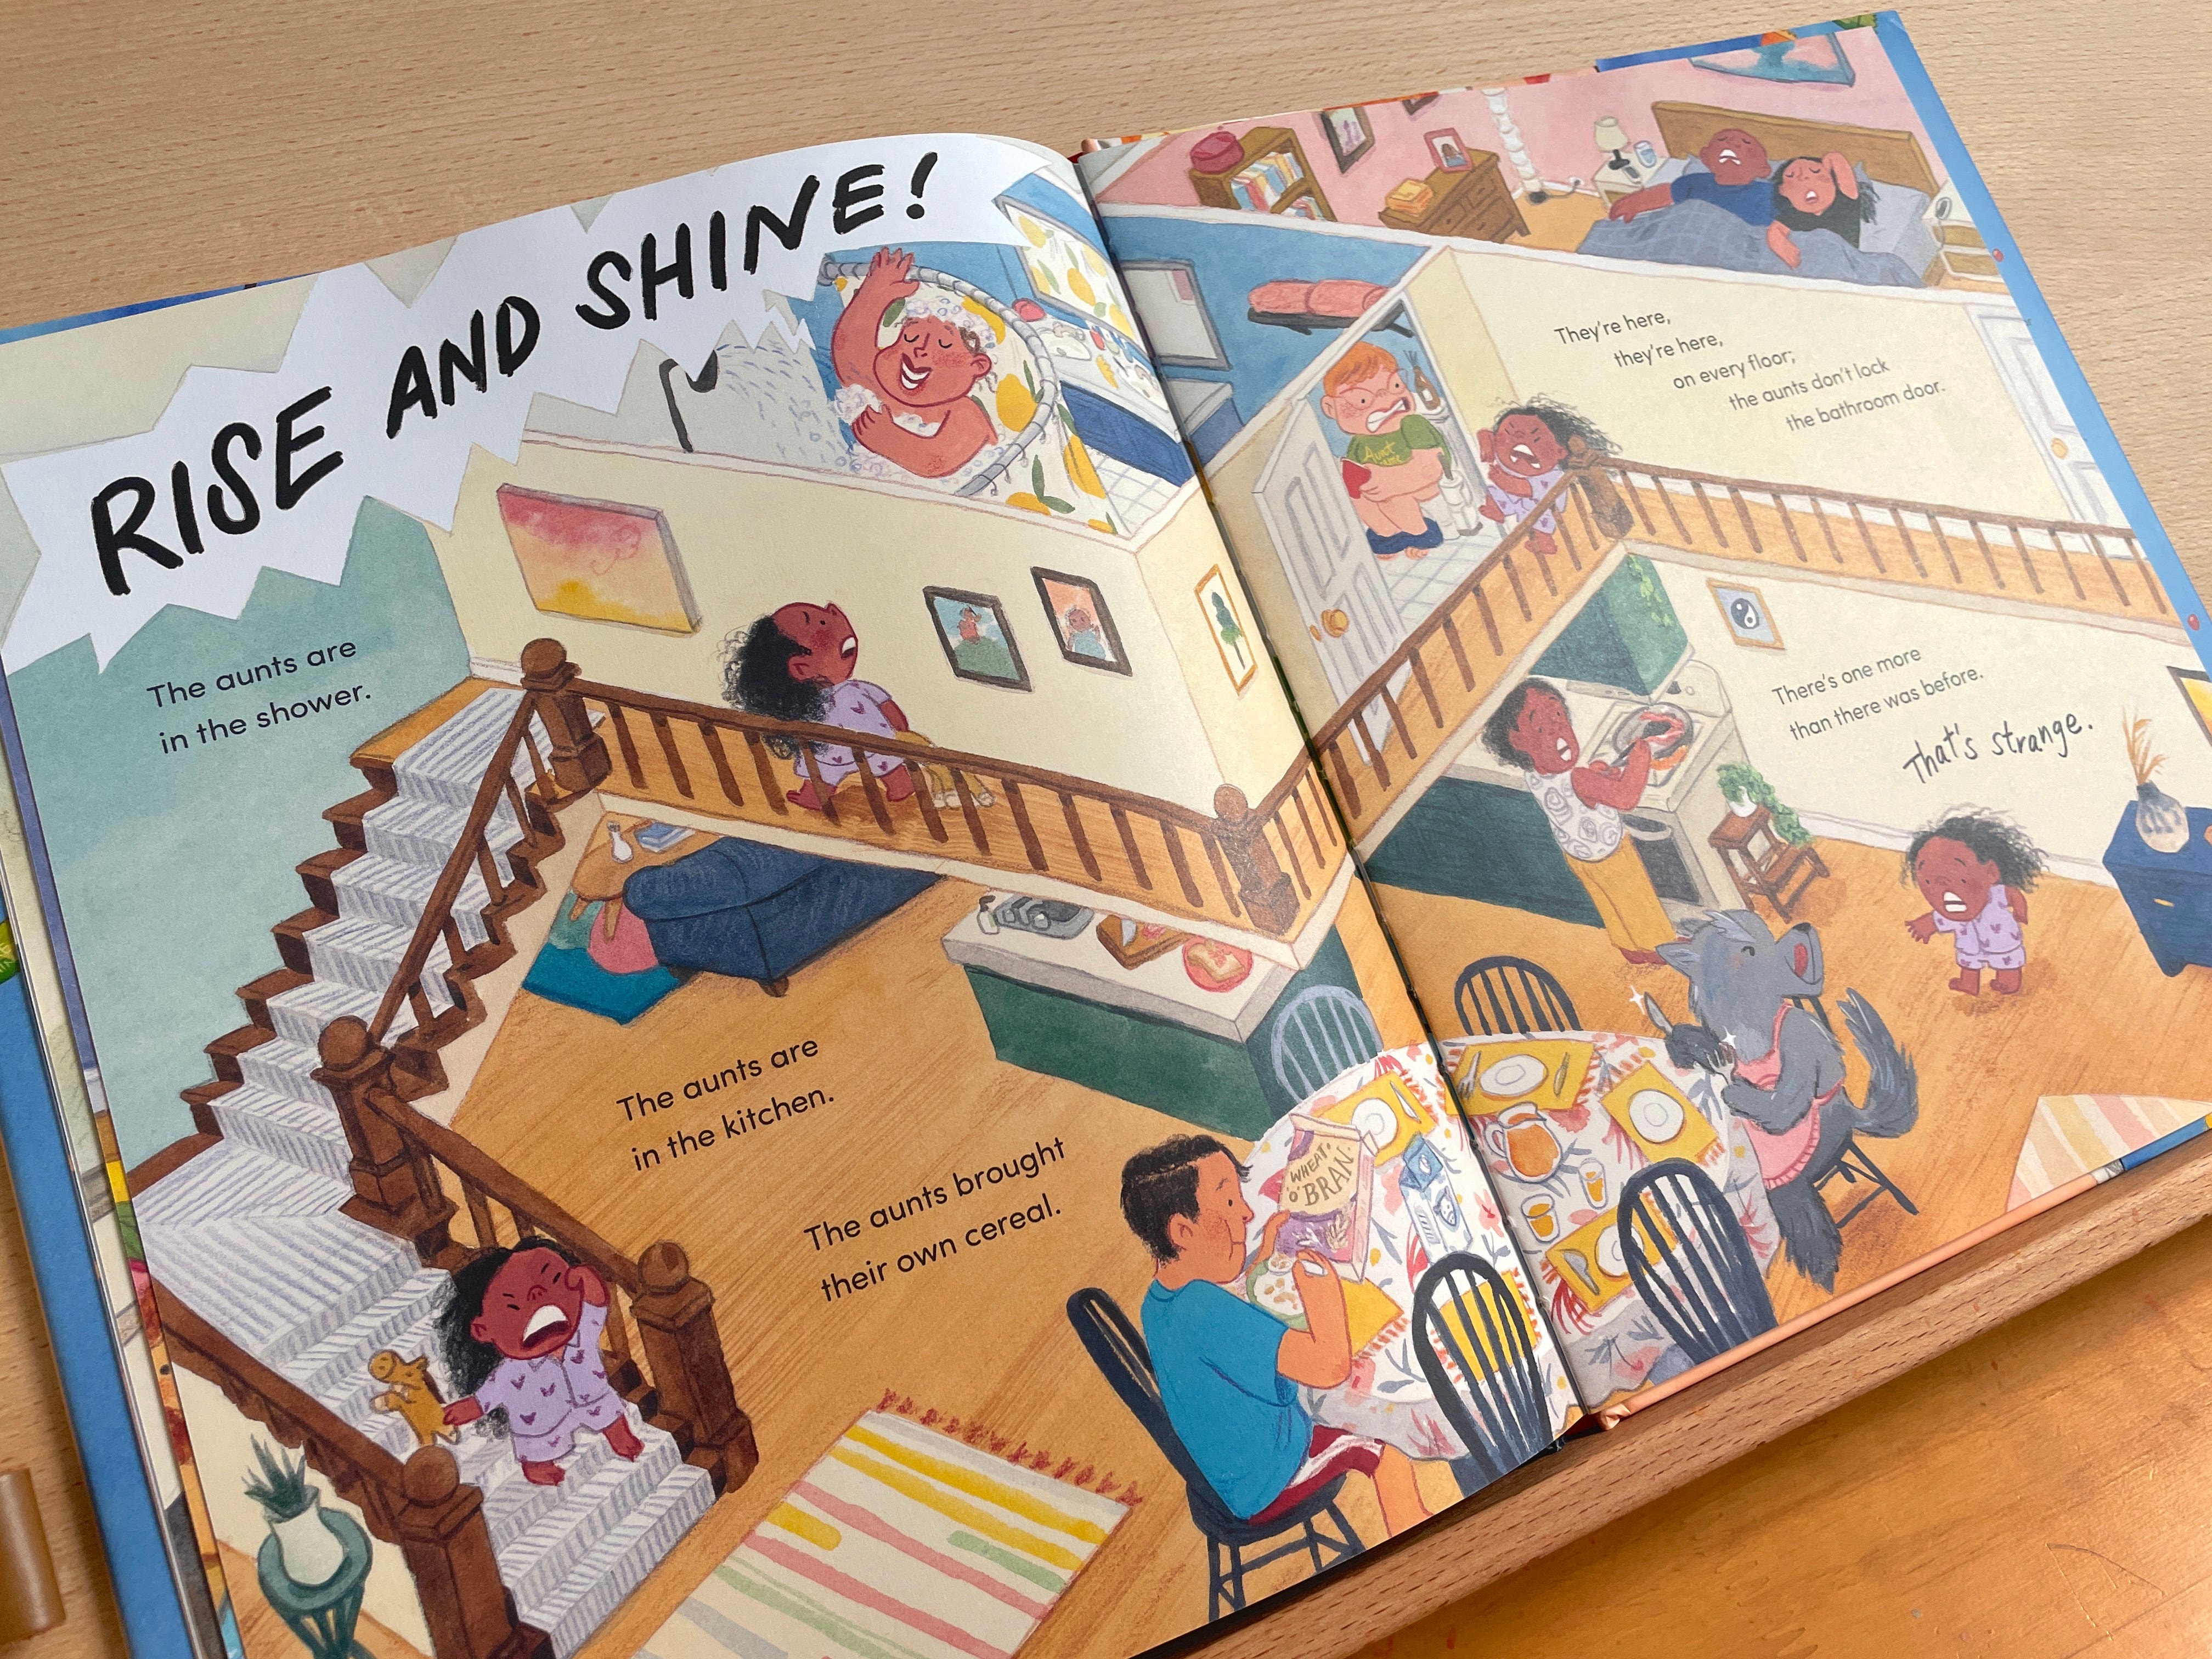
Ta da! here is what it looks like printed in the book. The folks over at Chronicle Books did a fantastic job on the printing and it looks just like you’re holding the actual painting in your hands.
We launched this book last week in NY! They flew Adam Rex all the way out and we had a blast finally meeting. Here are some photos from our launch event at Powerhouse in Brooklyn:


We also visited a school and had much fun talking to a bunch of kids from nursery to 1st grade. We drew suggestions from the crowd for what an aunt would look like. Unfortunately for 4-6 year olds, aunts are: “old” “wrinkled” and have “grey hair.” One girl said they have 6 legs which I think may have been a pronunciation error on our part for having aunts sound like ants.


Anyways, above on the right is the drawing I did for the kids, it got many many giggles and one kid even ruthlessly told his teacher that it looked like her. So here we are posing next to it.
I hope you enjoyed this post and learnt some new things. Now go forth and steal all my painting secrets!
As always, I cannot end this without saying: if you haven’t ordered my book already, you can order it through the link below:
Thanks for reading and make sure you let an aunt know you love them today.
The step 14 made me burst into laughter! Such a familiar feeling that I literally FELT it. Thank you for sharing your process, it was such a pleasure to read it through. I'm also illustrating a picture book in watercolours & coloured pencils at the moment - the feeling of the drawing being a disaster until the very last step when it all finally comes together... is simply inevitable.
Wow x 1000! This is so brilliant! Thanks for the sharing the workflow. It was fascinating!